Install PMM HA Cluster
Technical Preview: Not production-ready
This feature is in Technical Preview for testing and feedback only. Expect known issues, breaking changes, and incomplete features.
Test in non-production environments only and provide feedback to shape the GA release.
VictoriaMetrics limitations
This Tech Preview does not support:
- Prometheus data imports: Cannot import existing Prometheus files
- Metrics downsampling: No automatic historical data optimization
If your strategy requires these features, evaluate carefully before testing.
This sets up three PMM server replicas with Raft consensus, configures HAProxy for automatic load balancing, and deploys distributed databases (ClickHouse, VictoriaMetrics, PostgreSQL) via Kubernetes operators.
Before you start, make sure you understand how HA Cluster works. See Understand HA Cluster for an overview of the architecture and how failover works.
Understand two-step installation
PMM High Availability Cluster uses a two-step installation process that separates database operators from monitoring components. This separation simplifies upgrades and prevents cleanup issues when uninstalling.
Step 1: Install operators
Installs Kubernetes operators to create and manage database clusters:
- VictoriaMetrics operator
- ClickHouse operator
- PostgreSQL operator
Step 2: Install PMM HA
Installs monitoring infrastructure:
- 3 PMM monitoring servers with automatic leader election using Raft consensus (one active leader, two standbys)
- 3 HAProxy load balancers that route traffic to the active leader with automatic failover and pod anti-affinity
- ClickHouse cluster with 3 replicas and ClickHouse Keeper for Query Analytics storage (managed by Altinity ClickHouse Operator)
- VictoriaMetrics cluster for distributed metrics storage with multiple replicas (managed by VictoriaMetrics Operator)
- PostgreSQL cluster providing HA storage for Grafana metadata (managed by Percona PostgreSQL Operator)
To install PMM HA:
Get PMM HA Cluster running in 10 minutes with this simplified setup. For advanced configuration options, use the full installation option.
-
Add Percona Helm repositories:
helm repo add percona https://percona.github.io/percona-helm-charts/ helm repo update -
Create namespace:
kubectl create namespace pmm -
Install required Kubernetes operators:
helm install pmm-operators percona/pmm-ha-dependencies --namespace pmm # Wait for all operators to be ready (typically 2-3 minutes) kubectl wait --for=condition=ready pod \ -l app.kubernetes.io/name=victoria-metrics-operator \ -n pmm --timeout=300s kubectl wait --for=condition=ready pod \ -l app.kubernetes.io/name=altinity-clickhouse-operator \ -n pmm --timeout=300s kubectl wait --for=condition=ready pod \ -l app.kubernetes.io/name=pg-operator \ -n pmm --timeout=300s -
Create PMM secret with your passwords:
kubectl create secret generic pmm-secret \ --from-literal=PMM_ADMIN_PASSWORD="your-secure-password" \ --from-literal=PMM_CLICKHOUSE_USER="clickhouse_pmm" \ --from-literal=PMM_CLICKHOUSE_PASSWORD="clickhouse-password" \ --from-literal=VMAGENT_remoteWrite_basicAuth_username="victoriametrics_pmm" \ --from-literal=VMAGENT_remoteWrite_basicAuth_password="vm-password" \ --from-literal=PG_PASSWORD="postgres-password" \ --from-literal=GF_PASSWORD="grafana-password" \ --namespace pmm -
Install PMM HA:
helm install pmm-ha percona/pmm-ha --namespace pmm -
Wait for deployment to complete:
kubectl wait --for=condition=ready pod \
  -l app.kubernetes.io/name=pmm \
  -n pmm --timeout=600s
For more control over your deployment, including custom configurations, manual operator installation, and detailed verification at each stage.
Step 1: Add Percona Helm repositories
Add the required Helm repositories and update dependencies.
-
Add the repositories:
helm repo add percona https://percona.github.io/percona-helm-charts/ helm repo add vm https://victoriametrics.github.io/helm-charts/ helm repo add altinity https://docs.altinity.com/helm-charts/ helm repo update helm dependency update percona/pmm-ha-dependencies -
Verify the repository was added:
helm search repo percona/pmm-ha
Step 2: Create namespace
kubectl create namespace pmm
Step 3: Install Kubernetes operators
PMM needs three operators to run on Kubernetes. You can install all of them with one command, or install them separately if you need custom configurations:
-
Choose your installation method:
Install all three operators with one command:
helm install pmm-operators percona/pmm-ha-dependencies --namespace pmmthis installs:
- VictoriaMetrics Operator
- Altinity ClickHouse Operator
- Percona PostgreSQL Operator
Install operators separately for custom configurations:
VictoriaMetrics Operator
helm repo add vm https://victoriametrics.github.io/helm-charts/
helm repo update
helm install victoria-metrics-operator vm/victoria-metrics-operator \
  --namespace pmm \
  --set admissionWebhooks.enabled=true
ClickHouse Operator
helm repo add altinity https://helm.altinity.com
helm repo update
helm install clickhouse-operator altinity/altinity-clickhouse-operator \
  --namespace pmm
PostgreSQL Operator
helm install postgres-operator percona/pg-operator --namespace pmm -
Wait for operators to be ready:
# VictoriaMetrics Operator
kubectl wait --for=condition=ready pod \
  -l app.kubernetes.io/name=victoria-metrics-operator \
  -n pmm --timeout=300s

# ClickHouse Operator
kubectl wait --for=condition=ready pod \
  -l app.kubernetes.io/name=altinity-clickhouse-operator \
  -n pmm --timeout=300s

# PostgreSQL Operator
kubectl wait --for=condition=ready pod \
  -l app.kubernetes.io/name=pg-operator \
  -n pmm --timeout=300s
Step 4: Create PMM credentials secret
The secret.create parameter is set to false by default in the Helm chart. You must create the pmm-secret manually before installing PMM HA.
This prevents Helm from overwriting your secrets during upgrades and keeps sensitive credentials out of your values.yaml file.
kubectl create secret generic pmm-secret \
  --from-literal=PMM_ADMIN_PASSWORD="your-secure-password" \
  --from-literal=PMM_CLICKHOUSE_USER="clickhouse_pmm" \
  --from-literal=PMM_CLICKHOUSE_PASSWORD="your-clickhouse-password" \
  --from-literal=VMAGENT_remoteWrite_basicAuth_username="victoriametrics_pmm" \
  --from-literal=VMAGENT_remoteWrite_basicAuth_password="your-vm-password" \
  --from-literal=PG_PASSWORD="your-postgres-password" \
  --from-literal=GF_PASSWORD="your-grafana-password" \
  --namespace pmm
If you prefer to manage the secret as a file, create pmm-secret.yaml:
-
Create
pmm-secret.yaml:apiVersion: v1 kind: Secret metadata: name: pmm-secret namespace: pmm type: Opaque stringData: PMM_ADMIN_PASSWORD: "your-secure-password" PMM_CLICKHOUSE_USER: "clickhouse_pmm" PMM_CLICKHOUSE_PASSWORD: "your-clickhouse-password" VMAGENT_remoteWrite_basicAuth_username: "victoriametrics_pmm" VMAGENT_remoteWrite_basicAuth_password: "your-vm-password" PG_PASSWORD: "your-postgres-password" GF_PASSWORD: "your-grafana-password" -
Apply it:
kubectl apply -f pmm-secret.yaml
Step 5: Install PMM HA
helm install pmm-ha percona/pmm-ha --namespace pmm
Use custom configuration when you need to adjust resource limits, storage sizes, replica counts, or service types beyond the defaults.
This approach gives you full control over your PMM HA deployment settings.
-
Create a
values.yamlfile:# Example custom values replicas: 3 # Number of PMM server replicas haproxy: service: type: LoadBalancer # Change to LoadBalancer for external access storage: size: 100Gi # Adjust storage size as needed pmmResources: requests: cpu: "2" memory: "4Gi" limits: cpu: "4" memory: "8Gi" -
Install with custom values:
helm install pmm-ha percona/pmm-ha --namespace pmm -f values.yaml
Step 6: Verify installation
  # Check PMM server pods
  kubectl get pods -l app.kubernetes.io/name=pmm -n pmm

  # Check HAProxy pods
  kubectl get pods -l app.kubernetes.io/name=haproxy -n pmm

  # Check operator-managed resources
  kubectl get vmcluster,postgrescluster,clickhouseinstallation -n pmm

  # Wait for all PMM pods to be ready
  kubectl wait --for=condition=ready pod \
    -l app.kubernetes.io/name=pmm \
    -n pmm --timeout=600s
Access PMM after installation
Access via port-forward
For immediate testing:
- Create a port-forward to the HAProxy service:
kubectl port-forward -n pmm svc/pmm-ha-haproxy 8443:443 -
Open
https://localhost:8443in your browser. -
Log in with the default credentials:
admin/value fromPMM_ADMIN_PASSWORDin your secret.
Use service endpoints
PMM HA exposes multiple service endpoints for different purposes. For all external connections to PMM (including PMM Clients, web browsers, API calls, and Percona Operators) always use pmm-ha-haproxy.
This load balancer automatically routes traffic to the active PMM leader and handles failover transparently.
| Service | Description | Port | Use for |
|---|---|---|---|
pmm-ha-haproxy |
HAProxy load balancer with automatic failover | 443 (HTTPS) | All external access: PMM Clients, web browser, API calls, Percona Operators |
monitoring-service |
Headless service for direct PMM pod access. Do not use for external connections as it bypasses HAProxy and can cause failures during leader changes | 8443 (HTTPS) | Internal cluster communication only |
Access database components (advanced)
For direct database access or troubleshooting, PMM HA also exposes:
| Component | Service Name | Port | Purpose |
|---|---|---|---|
| ClickHouse | clickhouse-[release-name] |
8123 (HTTP), 9000 (Native) | Direct QAN database access |
| VictoriaMetrics | vmstorage-[release-name] |
8482 | Direct metrics storage access |
| PostgreSQL | [release]-pg-db-[cluster] |
5432 | Direct Grafana database access |
Configure PMM HA
Configure external access
HAProxy is only accessible within the Kubernetes cluster by default, which is recommended for security.
To enable external access when required, choose the configuration that matches your environment:
Best for: Internal cluster access only (recommended for security)
ClusterIP makes PMM accessible only within the Kubernetes cluster. This is the default setting and requires no configuration changes.
Option 1: Access from within the cluster
Use this DNS endpoint from any pod in the cluster:
https://pmm-ha-haproxy.pmm.svc.cluster.local:443
Option 2: Port-forward for local testing
Access PMM from your local machine for testing or administration:
-
Create a port-forward to the HAProxy service:
kubectl port-forward -n pmm svc/pmm-ha-haproxy 8443:443 -
Open
https://localhost:8443in your browser. -
Leave the port-forward running while you access PMM. Press
Ctrl+Cto stop.
Best for: AWS deployments requiring external access
-
Create a
values.yamlfile with AWS-specific annotations:haproxy: service: type: LoadBalancer annotations: service.beta.kubernetes.io/aws-load-balancer-type: "nlb" service.beta.kubernetes.io/aws-load-balancer-scheme: "internal" # or "internet-facing" -
Apply the configuration:
helm upgrade pmm-ha percona/pmm-ha --namespace pmm -f values.yaml -
Get the load balancer endpoint:
kubectl get svc pmm-ha-haproxy -n pmmLook for the
EXTERNAL-IPcolumn and connect viahttps://<EXTERNAL-IP>:443.
AWS best practices
- Use Network Load Balancer (NLB) for better performance and lower latency
- Use
internalscheme for VPC-only access to keep PMM private - Allocate Elastic IPs in advance for stable public addresses
Best for: GCP deployments requiring external access
Optional: Reserve a static IP address
-
Reserve a static IP in your region:
gcloud compute addresses create pmm-ip --region=us-central1 -
Get the IP address:
gcloud compute addresses describe pmm-ip \
  --region=us-central1 \
  --format="value(address)"
Configure and deploy
-
Create a
values.yamlfile:haproxy: service: type: LoadBalancer loadBalancerIP: "35.x.x.x" # Optional: use reserved IP annotations: networking.gke.io/load-balancer-type: "Internal" # Remove for public access -
Apply the configuration:
helm upgrade pmm-ha percona/pmm-ha --namespace pmm -f values.yaml -
Get the load balancer endpoint:
kubectl get svc pmm-ha-haproxy -n pmm
GCP best practices
- Reserve static IPs in advance to maintain consistent access endpoints
- Use internal load balancer for VPC-only access
Best for: Azure deployments requiring external access
Optional: Create a static public IP
-
Create a static IP in your AKS cluster’s resource group:
az network public-ip create \ --resource-group MC_myResourceGroup_myAKSCluster_eastus \ --name pmmPublicIP \ --sku Standard \ --allocation-method static -
Get the IP address:
az network public-ip show \
  --resource-group MC_myResourceGroup_myAKSCluster_eastus \
  --name pmmPublicIP \
  --query ipAddress \
  --output tsv
Configure and deploy
-
Create a
values.yamlfile:haproxy: service: type: LoadBalancer loadBalancerIP: "20.x.x.x" # Optional: use reserved IP annotations: service.beta.kubernetes.io/azure-load-balancer-internal: "true" # Remove for public -
Apply the configuration:
helm upgrade pmm-ha percona/pmm-ha --namespace pmm -f values.yaml -
Get the load balancer endpoint:
kubectl get svc pmm-ha-haproxy -n pmm
Azure best practices
- Create public IPs in the AKS cluster’s infrastructure resource group (MC_*)
- Use Standard SKU for production workloads
Best for: Bare-metal and on-premise Kubernetes clusters
Prerequisites
-
Install MetalLB in your cluster:
kubectl apply -f https://raw.githubusercontent.com/metallb/metallb/v0.13.12/config/manifests/metallb-native.yaml -
Create an IP address pool configuration file (
metallb-pool.yaml):apiVersion: metallb.io/v1beta1 kind: IPAddressPool metadata: name: production-pool namespace: metallb-system spec: addresses: - 192.168.1.100-192.168.1.110 -
Apply the IP pool configuration:
kubectl apply -f metallb-pool.yaml
Configure and deploy PMM
-
Create a
values.yamlfile:haproxy: service: type: LoadBalancer loadBalancerIP: "192.168.1.100" annotations: metallb.universe.tf/address-pool: "production-pool" -
Apply the configuration:
helm upgrade pmm-ha percona/pmm-ha --namespace pmm -f values.yaml -
Verify the load balancer endpoint:
kubectl get svc pmm-ha-haproxy -n pmm
MetalLB best practices
- Pre-allocate IP ranges that don’t conflict with DHCP
- Use Layer 2 mode for simplicity or BGP mode for advanced routing
Best for: Testing environments or when LoadBalancer is unavailable
NodePort exposes PMM on a static port on each cluster node.
-
Create a
values.yamlfile:haproxy: service: type: NodePort -
Apply the configuration:
helm upgrade pmm-ha percona/pmm-ha \ --namespace pmm \ -f values.yaml -
Get the assigned NodePort number:
kubectl get svc pmm-ha-haproxy -n pmm \ -o jsonpath='{.spec.ports[0].nodePort}' -
Access PMM using any node IP and the NodePort:
https://<any-node-ip>:<nodeport>
NodePort limitations
- Ports are typically in the range 30000-32767
- You must manage firewall rules to allow access to this port
- Consider using a cloud-specific LoadBalancer for production
Set up custom SSL certificates
PMM ships with self-signed SSL certificates. For production, provide your own certificates:
certs:
  name: pmm-certs
  files:
    certificate.crt: |
      -----BEGIN CERTIFICATE-----
      ... your certificate ...
      -----END CERTIFICATE-----
    certificate.key: |
      -----BEGIN PRIVATE KEY-----
      ... your private key ...
      -----END PRIVATE KEY-----
    ca-certs.pem: |
      -----BEGIN CERTIFICATE-----
      ... your CA certificate ...
      -----END CERTIFICATE-----
    dhparam.pem: |
      -----BEGIN DH PARAMETERS-----
      ... your DH parameters ...
      -----END DH PARAMETERS-----
Configure storage
PMM HA stores data in distributed databases, not on the PMM server pods themselves. To increase storage capacity, configure the ClickHouse and VictoriaMetrics clusters.
ClickHouse storage (Query Analytics data)
clickhouse:
  storage:
    size: 100Gi  # Increase for longer QAN retention
    storageClassName: "fast-ssd"
VictoriaMetrics storage (metrics data)
victoriaMetrics:
  vmstorage:
    storage:
      size: 100Gi  # Increase for longer metrics retention
      storageClassName: "fast-ssd"
Example: Combined storage configuration
clickhouse:
  storage:
    size: 200Gi
    storageClassName: "fast-ssd"

victoriaMetrics:
  vmstorage:
    storage:
      size: 200Gi
      storageClassName: "fast-ssd"
Apply the configuration:
helm upgrade pmm-ha percona/pmm-ha --namespace pmm -f values.yaml
Storage sizing
- ClickHouse: Scales with Query Analytics volume and retention period
- VictoriaMetrics: Scales with number of monitored services and metrics retention
See Plan your resources for sizing guidelines.
Set resource limits
Configure resource requests and limits for PMM server pods:
pmmResources:
  requests:
    cpu: "2"
    memory: "4Gi"
  limits:
    cpu: "4"
    memory: "8Gi"
Customize environment variables
PMM HA uses environment variables to control its behavior. The HA-specific variables are pre-configured for optimal cluster operation, while data retention and other settings can be customized to match your requirements.
Pre-configured HA variables
These variables are automatically set and manage critical cluster functions like leader election, gossip communication, and database integration:
pmmEnv:
  PMM_ENABLE_UPDATES: "0"                   # Updates managed via Helm (not UI)
  PMM_HA_ENABLE: "1"                        # Enable HA clustering
  PMM_HA_GOSSIP_PORT: "9096"                # Gossip protocol port
  PMM_HA_RAFT_PORT: "9097"                  # Raft consensus port
  PMM_HA_GRAFANA_GOSSIP_PORT: "9094"        # Grafana gossip port
  PMM_DISABLE_BUILTIN_CLICKHOUSE: "1"       # Use external ClickHouse
  PMM_DISABLE_BUILTIN_POSTGRES: "1"         # Use external PostgreSQL
  PMM_CLICKHOUSE_IS_CLUSTER: "1"            # Enable ClickHouse clustering
These variables are tested and validated for the HA architecture - modifying them is not recommended. PMM updates are managed through Helm chart upgrades rather than the UI to ensure consistency across all replicas.
Customizable settings
Adjust these variables in your values.yaml to match your monitoring requirements:
  pmmEnv:
    PMM_DATA_RETENTION: "2160h"  # Adjust based on your retention policy (default: 90 days)
    # Add other environment variables as needed
Common customizations
- Data retention: Set
PMM_DATA_RETENTIONbased on your compliance requirements and storage capacity (e.g.,720hfor 30 days,4320hfor 180 days) - Additional variables: See PMM environment variables documentation for all available options.
Review Helm parameters reference
| Parameter | Description | Default |
|---|---|---|
replicas |
Number of PMM server replicas | 3 |
image.repository |
PMM server image repository | percona/pmm-server |
image.tag |
PMM server image tag | 3.6.0 |
image.pullPolicy |
Image pull policy | IfNotPresent |
secret.create |
Create secret automatically | false |
secret.name |
Name of the PMM secret | pmm-secret |
storage.size |
PVC size | 10Gi |
storage.storageClassName |
Storage class name | "" |
haproxy.replicaCount |
Number of HAProxy replicas | 3 |
haproxy.service.type |
HAProxy service type | ClusterIP |
clickhouse.cluster.replicas |
ClickHouse replicas | 3 |
victoriaMetrics.vmstorage.replicaCount |
VictoriaMetrics storage replicas | 3 |
pg-db.enabled |
Enable PostgreSQL cluster | true |
pg-db.pmm.enabled |
Enable automatic PMM monitoring of PostgreSQL | true |
For a complete list of parameters, see the values.yaml file.
Use and maintain PMM HA
Connect monitoring clients
To connect a PMM client to the HA cluster, use the HAProxy service endpoint:
# From within the Kubernetes cluster
pmm-admin config \
  --server-url=https://admin:your-password@pmm-ha-haproxy:443 \
  --server-insecure-tls

# Using service token (recommended for automation)
pmm-admin config \
  --server-url=https://service_token:your-token@pmm-ha-haproxy:443 \
  --server-insecure-tls
Monitor PostgreSQL databases
To add PostgreSQL monitoring to PMM HA, see Deploy a PMM client in the Percona PostgreSQL Operator documentation.
When configuring, use pmm-ha-haproxy.pmm.svc.cluster.local as the PMM server hostname.
Manage service tokens
To retrieve the auto-generated PostgreSQL monitoring token:
kubectl get secret pg-pmm-secret -n pmm \
  -o jsonpath='{.data.PMM_SERVER_TOKEN}' | base64 -d
To create additional service tokens manually, see the PMM documentation on service accounts.
Monitor HA features
Monitor cluster health
Use the PMM HA Health Overview dashboard to monitor your entire HA deployment from a single view.
This dashboard shows real-time health status for all critical components including PMM server replicas, PostgreSQL, ClickHouse, VictoriaMetrics, and HAProxy.
Access the dashboard from All Dashboards > Browse all dashboards > Experimental > PMM HA Health Overview.
The dashboard helps you quickly identify component failures, resource constraints, and stability issues across your high-availability infrastructure.
For detailed information about each panel and what to check, see the PMM HA Health Overview dashboard reference.
Identify the leader node
PMM displays a visual badge on the side menu and displays the name of the active PMM instance that’s currently handling all monitoring operations. For example, pmm-ha-0, pmm-ha-1, or pmm-ha-2.
Check this to quickly identify which server is active without needing to query the cluster directly:
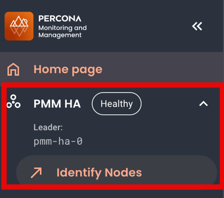
The badge also includes a health status indicator that reflects the overall cluster state based on how many nodes are responding:
- Healthy indicates all nodes are in “alive” status and functioning normally
- Degraded means approximately one-third of your nodes are not responding
- Critical warns that two-thirds of your nodes are unavailable
- Down signals that all nodes have failed to respond
The health status may not display correctly due to a known issue in this Tech Preview version. Verify cluster health in the Inventory or using kubectl if needed.
Check HA roles in Inventory
View detailed role and health information for all PMM nodes in one place.
-
Go to Inventory > Nodes.
-
Locate nodes with names starting with
pmm-ha(for example,pmm-ha-0,pmm-ha-1,pmm-ha-2). -
Click the arrow in the Options column to expand the node details.
-
Check the Labels section to see:
- Leader status: which node is currently active
- Follower status: which nodes are on standby
- Health status: whether each node is responding
Scale your deployment
Scale PMM server replicas
When you scale PMM HA up or down, all PMM pods will be recreated. This happens because the PMM_HA_PEERS environment variable is dynamically generated based on replica count and must be updated on all pods.
Impact:
- Brief service interruption during pod recreation (typically < 1 minute per pod)
- HAProxy continues routing to available pods during rollout
- No data loss (distributed storage)
- Rolling update strategy minimizes downtime
To scale PMM server replicas:
helm upgrade pmm-ha percona/pmm-ha \
  --namespace pmm \
  --set replicas=5
Scale HAProxy replicas
helm upgrade pmm-ha percona/pmm-ha \
  --namespace pmm \
  --set haproxy.replicaCount=5
Scale database components
helm upgrade pmm-ha percona/pmm-ha \
  --namespace pmm \
  --set clickhouse.cluster.replicas=5
helm upgrade pmm-ha percona/pmm-ha \
  --namespace pmm \
  --set victoriaMetrics.vmselect.replicaCount=3 \
  --set victoriaMetrics.vminsert.replicaCount=3 \
  --set victoriaMetrics.vmstorage.replicaCount=5
PostgreSQL scaling is managed through the Percona PostgreSQL Operator. See the Operator documentation for details.
Pre-pull images before scaling
PMM images can be large (several GB). Before performing upgrades or scaling operations, pre-pull images on all nodes to avoid timeout issues:
# Get list of nodes
kubectl get nodes

# For each node, pre-pull the image (example for node1)
kubectl debug node/node1 -it --image=percona/pmm-server:3.6.0
Monitor cluster health
To check the health of your PMM HA deployment:
# Check all PMM HA resources
kubectl get all -l app.kubernetes.io/instance=pmm-ha -n pmm

# Check PMM server pods
kubectl get pods -l app.kubernetes.io/name=pmm -n pmm

# Check HAProxy pods
kubectl get pods -l app.kubernetes.io/name=haproxy -n pmm

# Check ClickHouse cluster
kubectl get clickhouseinstallation -n pmm
kubectl get pods -l clickhouse.altinity.com/app=chop -n pmm

# Check VictoriaMetrics cluster
kubectl get vmcluster,vmagent,vmauth -n pmm

# Check PostgreSQL cluster
kubectl get postgrescluster -n pmm
kubectl get pods -l postgres-operator.crunchydata.com/cluster -n pmm

# View PMM server logs
kubectl logs -l app.kubernetes.io/name=pmm -n pmm --tail=100

# View HAProxy logs
kubectl logs -l app.kubernetes.io/name=haproxy -n pmm --tail=100
Query HA status via API
For programmatic access to cluster status and node information, PMM HA provides REST API endpoints. These endpoints let you integrate HA monitoring into automation scripts, monitoring dashboards, or alerting systems.
Available endpoints:
GET /v1/ha/status: Check if PMM is running in HA modeGET /v1/ha/nodes: Get cluster node information with roles and availability
For complete endpoint documentation, request/response examples, and integration patterns, see the HA status API reference.
Modify your PMM HA deployment
This Tech Preview does not support upgrading between PMM versions. You can only modify configuration within the same version.
Use Helm upgrades to modify settings like resource limits, replica counts, or storage sizes within your current PMM version. Rolling updates ensure zero downtime. Each pod updates sequentially while HAProxy keeps traffic flowing to healthy nodes.
Change individual settings using command-line flags.
-
Update the setting you want to change:
# Example: Increase PMM server replicas
helm upgrade pmm-ha percona/pmm-ha \
  --namespace pmm \
  --set replicas=5
Common modifications:
# Increase HAProxy replicas --set haproxy.replicaCount=5 # Adjust resource limits --set pmmResources.limits.cpu="8" \ --set pmmResources.limits.memory="16Gi" # Change storage size --set storage.size=200Gi -
Monitor the rollout:
kubectl rollout status statefulset pmm-ha -n pmm
Modify multiple settings using a values file.
-
Edit your
values.yamlfile with the changes you need:replicas: 5 haproxy: replicaCount: 5 pmmResources: limits: cpu: "8" memory: "16Gi" -
Apply your changes:
helm upgrade pmm-ha percona/pmm-ha \ --namespace pmm \ -f values.yaml -
Monitor the rollout:
kubectl rollout status statefulset pmm-ha -n pmm
Keep your values file
Save your values.yaml file for future updates. This ensures consistent configuration across modifications.
Roll back configuration changes
If a configuration change causes issues, roll back to a previous release:
-
List available revisions:
helm history pmm-ha -n pmm -
Roll back to a specific revision:
helm rollback pmm-ha <revision-number> -n pmm
For example, to roll back to revision 2:
helm rollback pmm-ha 2 -n pmm
This restores your previous Helm release configuration, reverting any settings changes you made.
Troubleshoot issues
Issue: Pods stuck in Pending state
Solution: Check PV provisioner and ensure sufficient cluster resources:
kubectl describe pod <pod-name> -n pmm
kubectl get pv,pvc -n pmm
Issue: PMM not accessible after install
Solution: Verify HAProxy service is running and has endpoints:
kubectl get svc pmm-ha-haproxy -n pmm
kubectl get endpoints pmm-ha-haproxy -n pmm
kubectl describe svc pmm-ha-haproxy -n pmm
Issue: High memory usage
Solution: Adjust resource limits and check retention settings:
kubectl top pods -n pmm
kubectl describe pod <pod-name> -n pmm
Issue: Resources stuck in “Terminating” state
Solution: Some resources may have finalizers preventing deletion. Remove finalizers manually:
# Remove finalizer from a stuck resource
kubectl patch <resource-type> <resource-name> -n pmm \
  -p '{"metadata":{"finalizers":[]}}' --type=merge
Known issues
We are aware of the following issues in this Tech Preview version and plan to fix them before General Availability:
| Issue | Impact | Workaround |
|---|---|---|
| PMM-14704: PostgreSQL nodes in dropdown | Node selector shows database instances alongside PMM nodes | Select only nodes named pmm-ha-0, pmm-ha-1, pmm-ha-2 |
| PMM-14705: CLI-added services show no metrics | Services from pmm-admin appear as UNSPECIFIED, dashboards empty (QAN works) |
Add services via PMM UI instead |
| PMM-14706: Extra ‘pmm-’ prefix | PostgreSQL nodes show as pmm-pmm-ha-pg-... |
Cosmetic only - no action needed |
| PMM-14707: Wrong PostgreSQL status | Inventory shows FAILED/UNSPECIFIED despite working metrics | Check dashboards to verify metrics flow |
| PMM-14734: Incorrect status | HA badge on PMM Home Dashboard may not reflect true cluster health | Use Inventory view or kubectl commands to check actual cluster status |
| PMM-14709: Data retention does not work on HA | Changing data retention under Configuration > Settings > Advanced Settings has no effect and older metrics remain available despite the new retention value. | Technical Preview only: The UI-based data retention setting does not work in HA clusters. To implement retention, configure it directly in ClickHouse using ALTER TABLE ... TTL instead of relying on this UI option to remove old metrics. |
Scaling limitations
Scaling down to single replica
When scaling down to a single PMM replica (from 3 to 1), ensure the Raft leader is on pmm-0 before scaling. Kubernetes StatefulSets remove pods in reverse ordinal order (highest first).
- Scaling 3→1 removes pmm-2 and pmm-1, keeping only pmm-0
- If the Raft leader is on pmm-1 or pmm-2 when you scale down, PMM will become unreachable
Workaround: Check leader status before scaling:
kubectl exec -it pmm-ha-0 -n pmm -- pmm-admin status
Only scale down after confirming pmm-0 is the leader.
VictoriaMetrics limitations
PMM HA Tech Preview does not support these VictoriaMetrics Enterprise features:
- Prometheus data file reading: Cannot import existing Prometheus data files into PMM HA
- Metrics downsampling: No automatic downsampling of historical metrics for long-term storage efficiency
Impact: If you currently rely on these features, plan accordingly for your monitoring strategy.
Uninstall PMM HA
When uninstalling PMM HA, make sure to follow this exact order. Uninstalling out of sequence leaves orphaned resources that cannot be auto-cleaned.
Step 1: Remove PMM HA deployment
helm uninstall pmm-ha --namespace pmm
Step 2: Wait for operator cleanup
Operators automatically remove managed resources. Wait for completion:
# Wait for VictoriaMetrics resources
kubectl wait --for=delete vmcluster \
  -l app.kubernetes.io/instance=pmm-ha \
  -n pmm --timeout=300s

# Wait for PostgreSQL resources
kubectl wait --for=delete postgrescluster \
  -l app.kubernetes.io/instance=pmm-ha \
  -n pmm --timeout=300s

# Wait for ClickHouse resources
kubectl wait --for=delete clickhouseinstallation \
  -l app.kubernetes.io/instance=pmm-ha \
  -n pmm --timeout=300s
If wait times out, check status:
kubectl get vmcluster,postgrescluster,clickhouseinstallation -n pmm
Step 3: Remove operators
Based on how you installed the operators:
helm uninstall pmm-operators --namespace pmm
helm uninstall victoria-metrics-operator --namespace pmm
helm uninstall clickhouse-operator --namespace pmm
helm uninstall postgres-operator --namespace pmm
Step 4: (Optional) Delete CRDs
CRDs are cluster-wide. This deletes all resources of these types in all namespaces. Only proceed if you’re removing these operators entirely from the cluster:
# Verify no other resources exist first
kubectl get vmcluster,postgrescluster,clickhouseinstallation --all-namespaces

# If clear, delete CRDs
kubectl delete $(kubectl get crds -o name | grep victoriametrics)
kubectl delete $(kubectl get crds -o name | grep clickhouse)
kubectl delete $(kubectl get crds -o name | grep -E "(postgres-operator|perconapg)")
Step 5: (Optional) Delete data
Permanent data loss
This irreversibly deletes all monitoring history, QAN data, dashboards, and configurations.
Choose one option:
# Option A: Delete all PVCs in the namespace
kubectl get pvc -n pmm  # Review first
# WARNING: This deletes ALL PVCs in the pmm namespace, not just PMM HA
kubectl delete pvc -n pmm --all
Verify complete removal
After uninstalling, verify all resources are removed:
# Check for remaining PMM resources
kubectl get all -n pmm

# Check for remaining CRDs (if you deleted them)
kubectl get crds | grep -E "(victoriametrics|clickhouse|postgres-operator|perconapg)"

# Check for remaining PVCs
kubectl get pvc -n pmm
Get help and provide feedback
This Tech Preview release is designed to gather community feedback before GA. Your feedback directly influences the feature set and improvements for the GA version!
Contact us
Share your experience
- What works well in your environment?
- What’s challenging or confusing?
- What features are you missing?
- How does performance compare to single-instance deployments?