Creating and managing Split-Horizon DNS configurations
Here’s how you can create, edit, and delete Split-Horizon DNS configuration for your Percona Server for MongoDB cluster in Percona Everest.
Create a Split-Horizon DNS Config
Follow these steps to create a new Split-Horizon DNS policy:
-
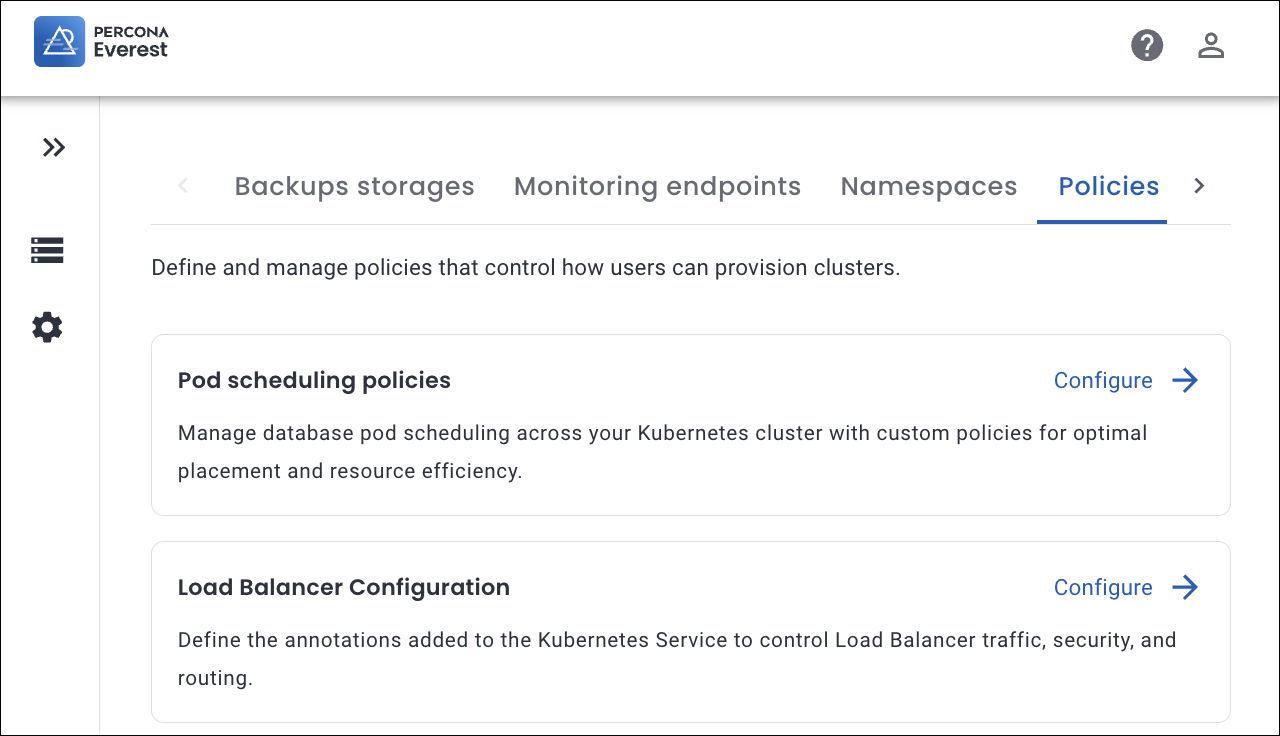
Navigate to the Percona Everest home page and go to Settings > Policies & configurations.
-
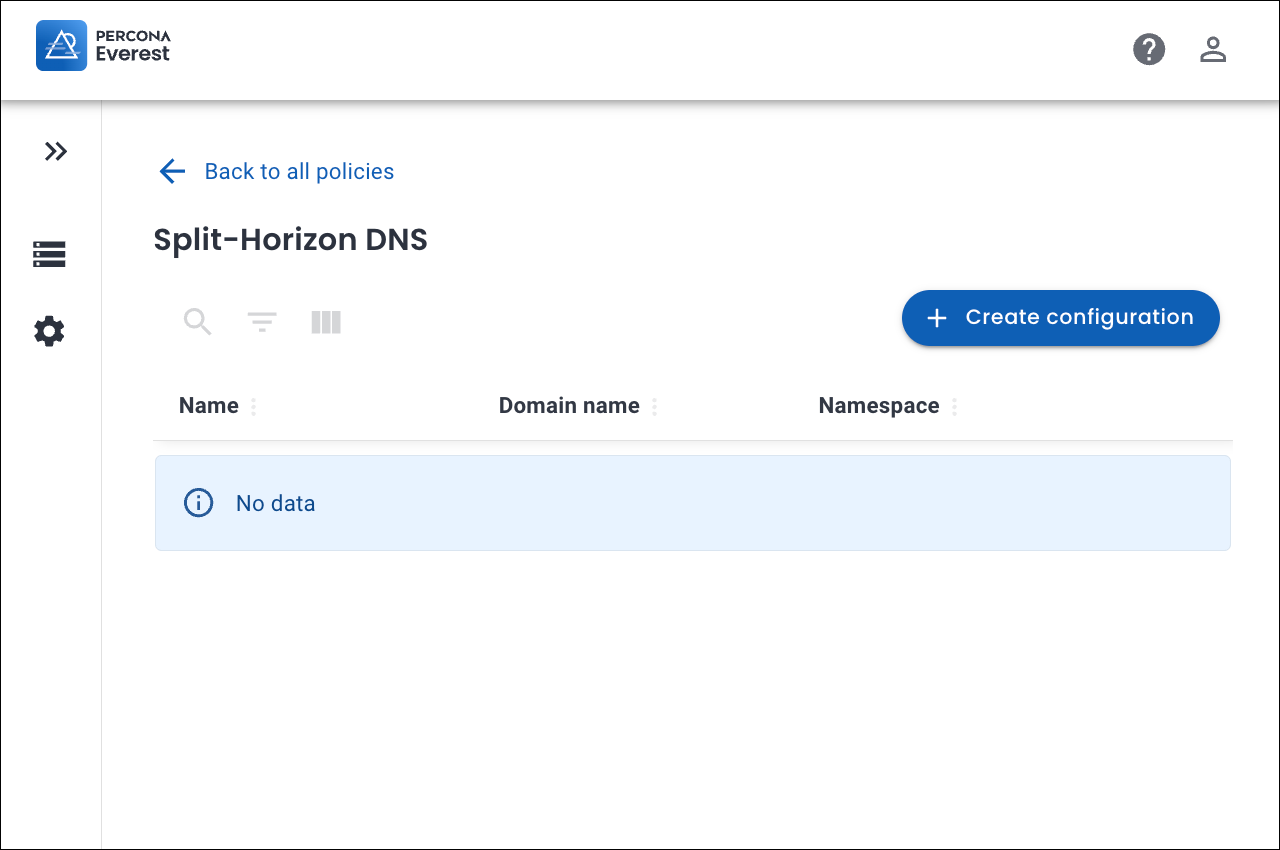
In the Split-Horizon DNS section, click Configure. The Split-Horizon DNS page opens.
-
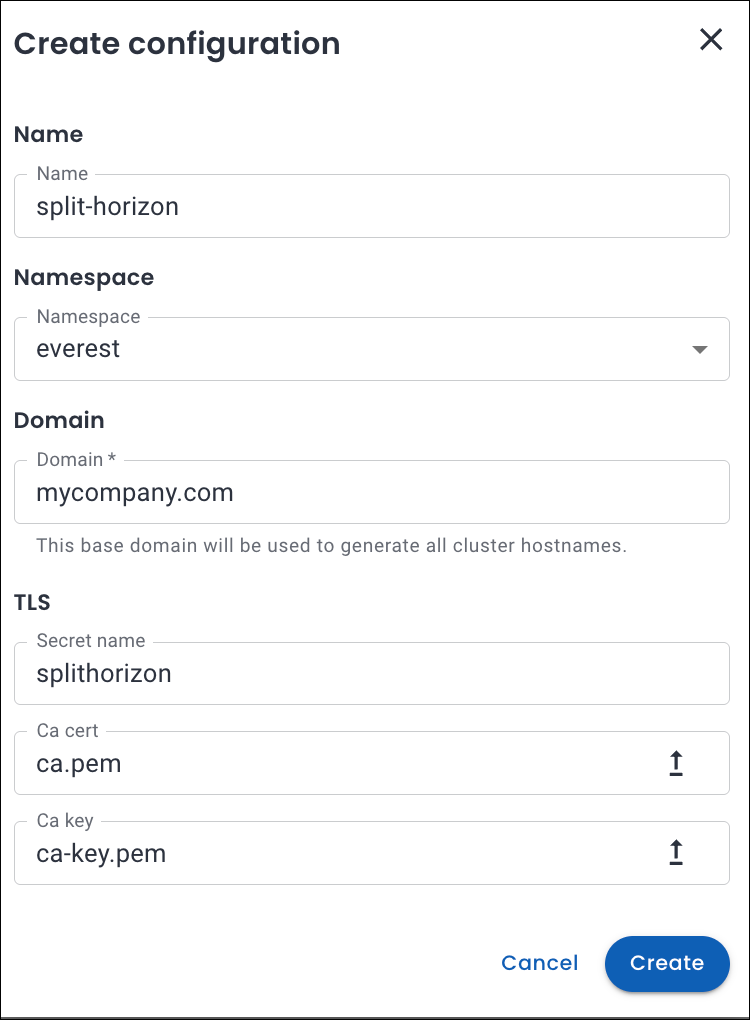
Click Create configuration. A pop-up window appears.
-
Enter the following:
- Name: The desired name for your Split-Horizon policy.
- Namespace: The Kubernetes namespace where you want to create the policy.
- Domain name suffix: A domain represents how your database endpoint is identified (for example, mydb.everest.local).
- TLS
- Secret name: Kubernetes Secret that stores the TLS certificate and private key associated with a particular domain.
- Ca key: Upload your CA private key file.
- Ca cert: Upload your Certificate Authority (CA) Certificate. A CA certificate is the root or intermediate certificate from the Certificate Authority (CA) that signed your TLS certificate. It helps clients verify that your database’s certificate is valid and trustworthy.
-
Click Create. Your Split-Horizon DNS policy will be created and appears in the configuration list.
Edit split-horizon DNS policy
Important
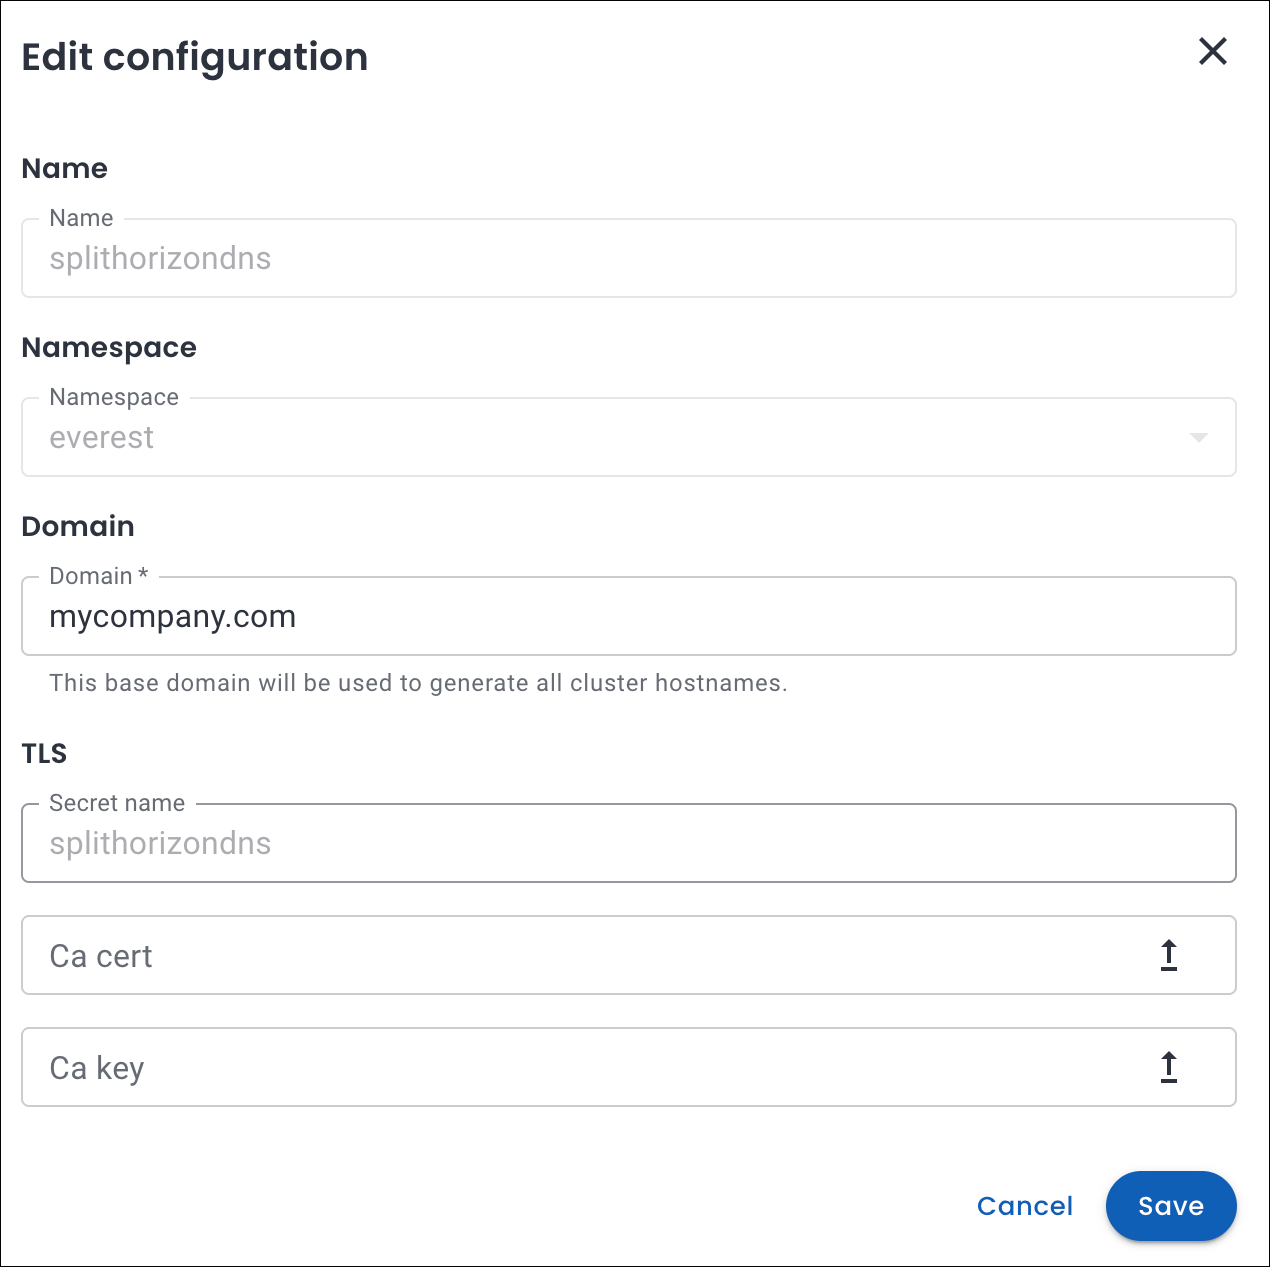
- You can edit a Split-Horizon DNS policy only if it is not associated with any active cluster.
- You can only edit the Domain, Ca cert, and Ca key fields.
Here’s how you can edit a Split-Horizon DNS policy for your MongoDB cluster:
-
Navigate to the Percona Everest home page and go to Settings > Policies & configurations.
-
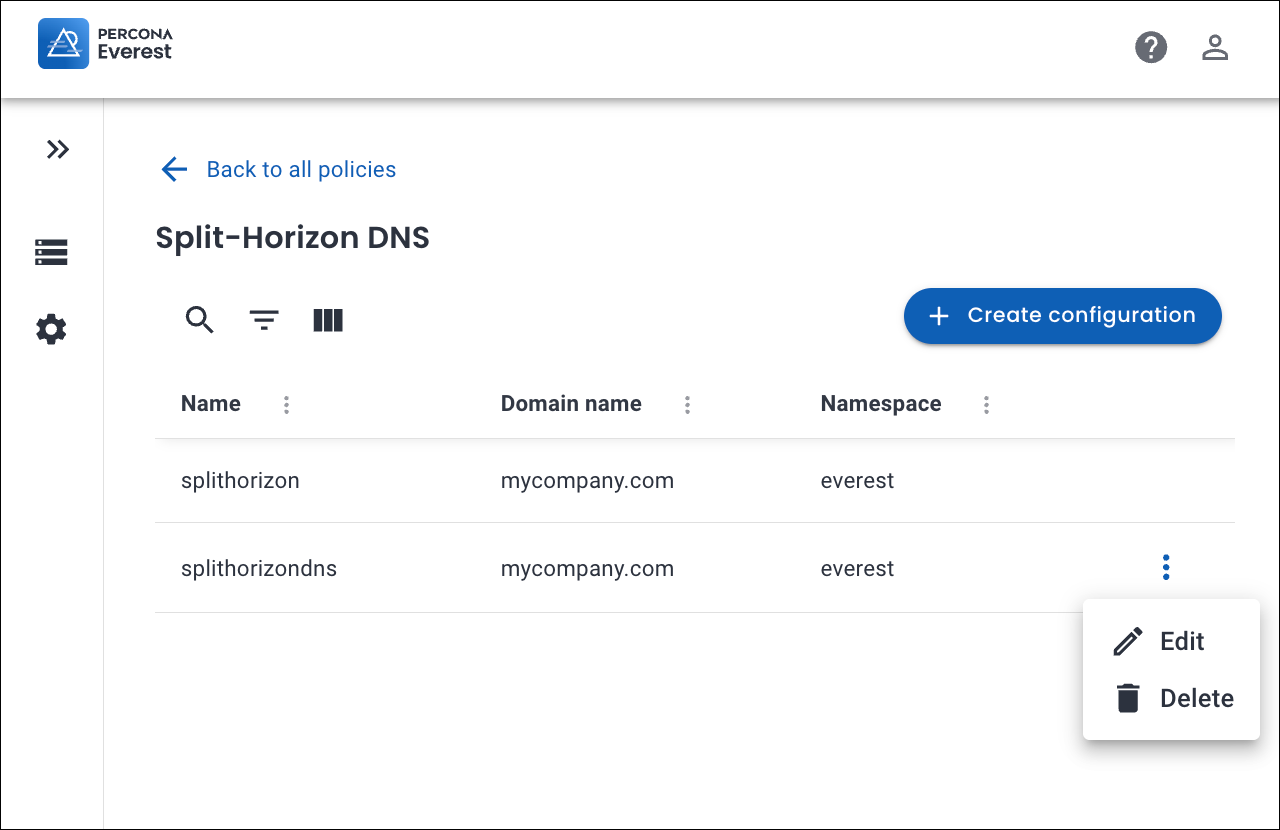
In the Split-Horizon DNS section, click Configure. The Split-Horizon DNS page opens. Here, you can see the existing Split-Horizon DNS policies.
-
Click the ellipsis (⋮) next to the Split-Horizon DNS policy you want to modify and select Edit. The Edit configuration pop-up opens.
-
Update the desired fields.
-
Click Save to apply the changes.
Delete a Split-Horizon DNS policy
Important
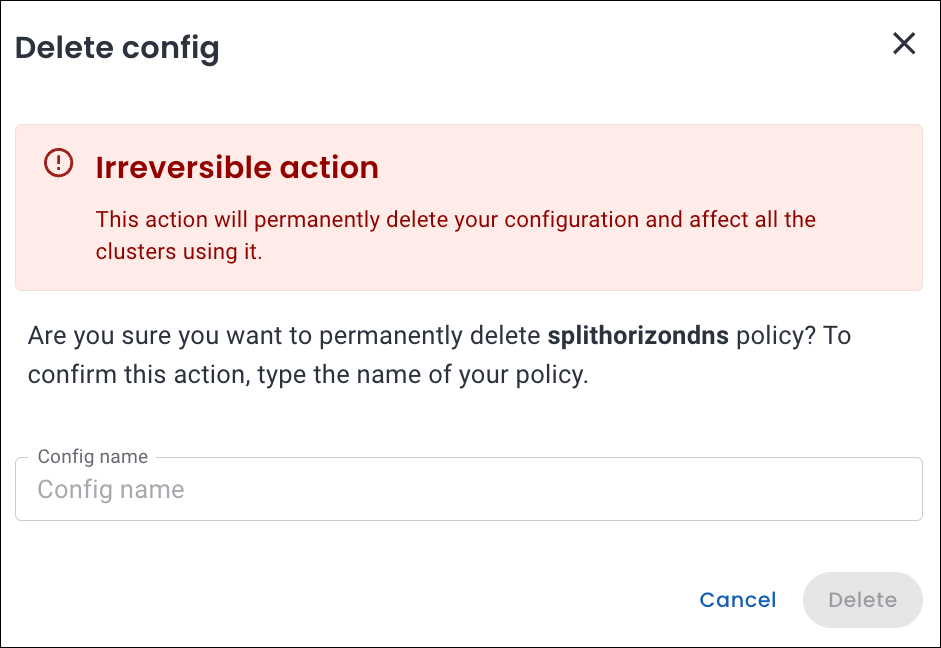
You can delete a Split-Horizon DNS config only if it is not used by any active cluster.
Here’s how you can delete an existing Split-Horizon DNS policy for a MongoDB cluster:
-
Navigate to the Percona Everest home page and go to Settings > Policies & configurations.
-
In the Split-Horizon DNS section, click Configure. The Split-Horizon DNS page opens. Here, you can see the existing Split-Horizon DNS policies.
-
Click on the ellipsis (⋮) next to the Split-Horizon DNS policy you want to delete.
-
Click Delete. A confirmation pop-up will be displayed for deleting the Split-Horizon DNS config policy.
-
Enter the Config name in the text box to confirm the deletion, and click Delete. Your Split-Horizon DNS policy will be deleted.

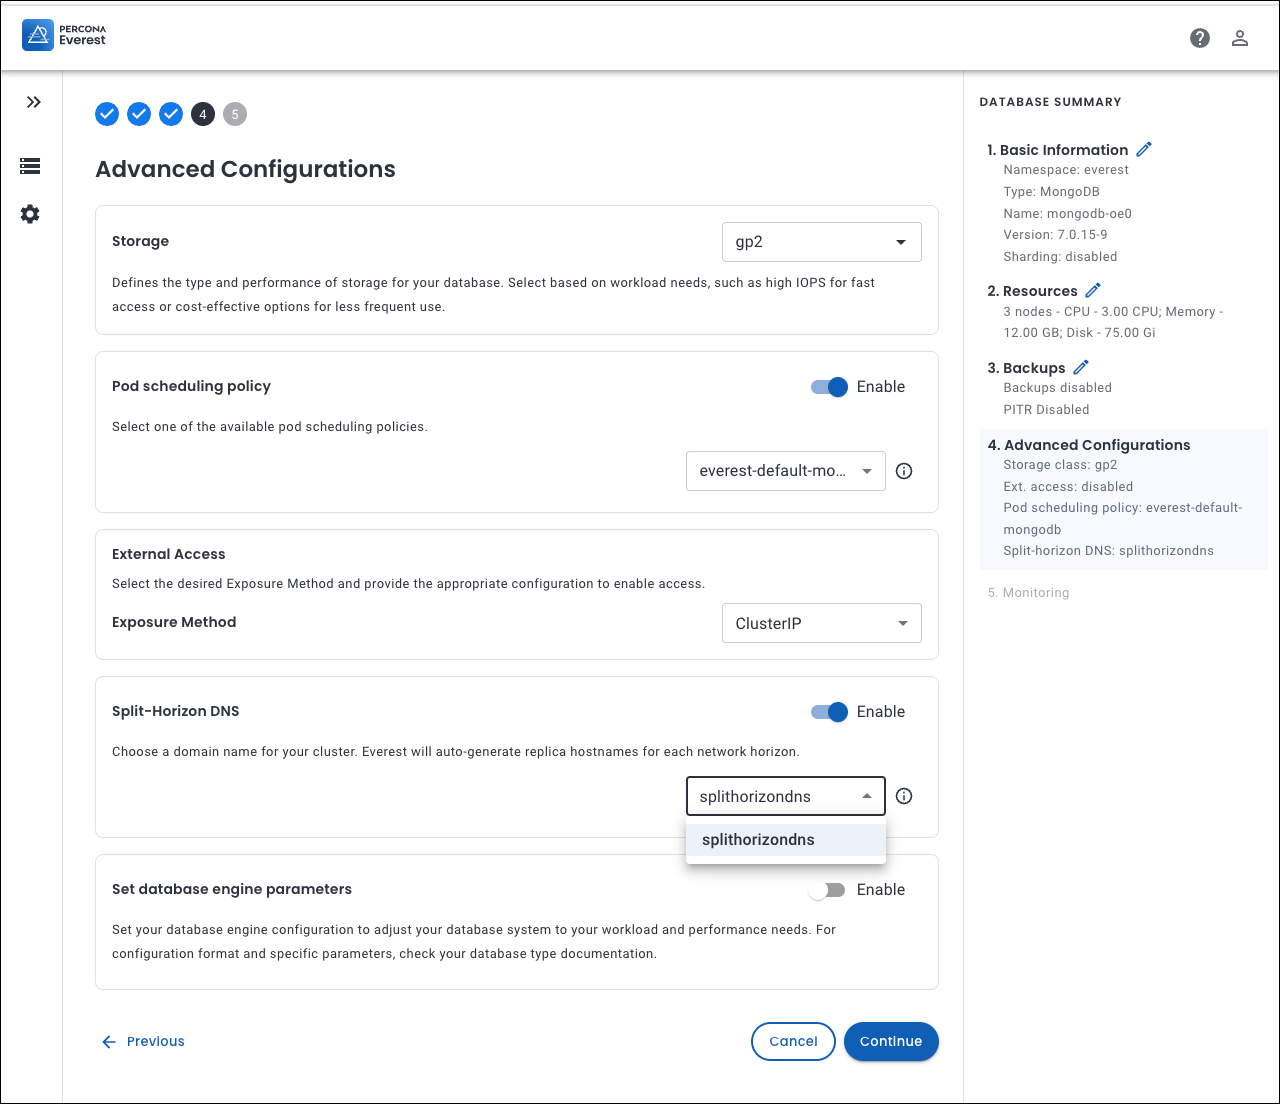
Configure Split-Horizon DNS policy for your MongoDB cluster
Important
Split-Horizon DNS is currently applicable only to non-sharded clusters.
You can configure Split-Horizon DNS policy for your MongoDB cluster during database creation:
-
Log in to the Percona Everest UI.
-
On the Percona Everest homepage, click Create database. Select the database that you wish to provision.
-
Continue through the setup until you reach the Advanced Configurations page.
-
In the Split-Horizon DNS section, enable it by turning the toggle ON.
-
Select the desired Split-Horizon DNS policy from the dropdown.
-
Click Continue until you reach the end of the wizard, and then click Create database.
-
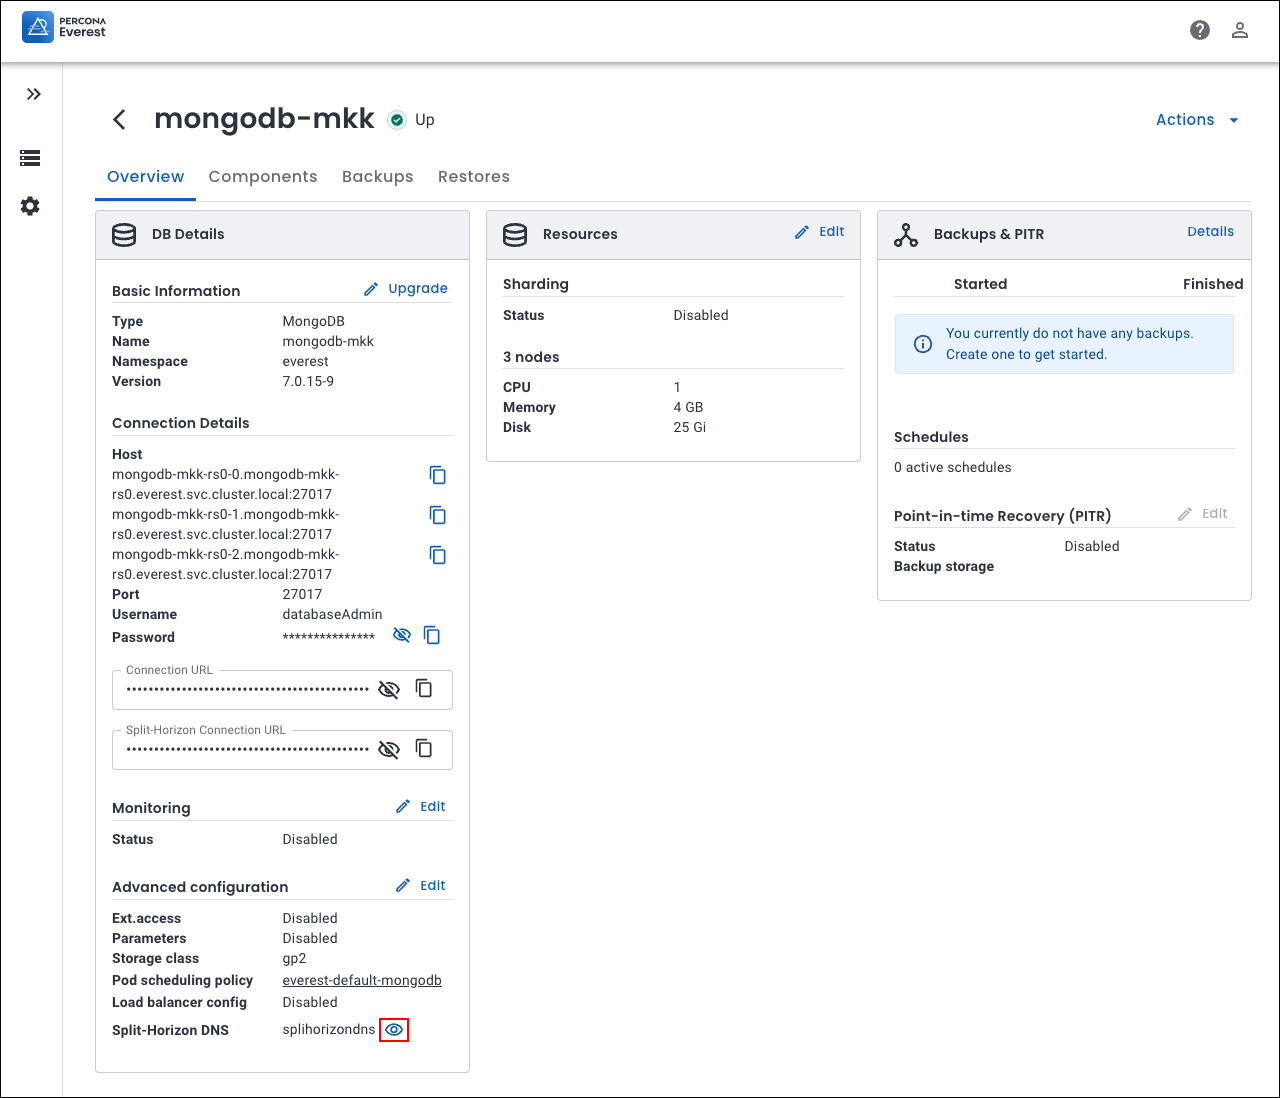
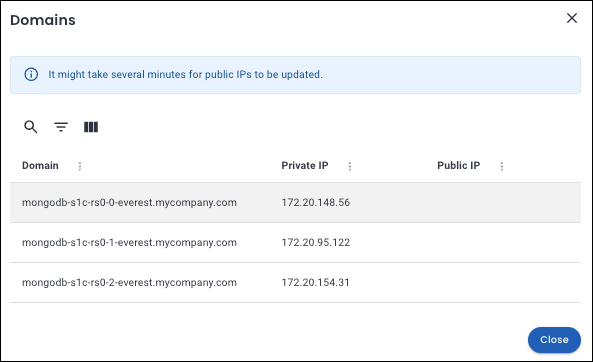
To view the Domain Names and IP Addresses generated for Split-Horizon DNS, open the Overview page of the desired database cluster and click the eye icon next to Split-Horizon DNS. The Domains tab opens. Percona Everest displays all generated domains along with their associated private and public IP addresses.