DataImporter: Percona Operator for MongoDB
The everest-percona-psmdb-operator data importer allows you to import backups taken using the Percona Operator for MongoDB.
Prerequisites
-
Backups taken only using the Percona MongoDB Operator stored in an S3-compatible storage bucket
Note
Backups created by other tools directly in an S3 bucket are not supported.
-
Credentials to access the S3 bucket (
AccessKeyIDandSecretAccessKey) - System user credentials from the source cluster. For more details, refer to the Percona Operator for MongoDB user documentation.
How to import external MongoDB backups using the Percona Everest UI
This section outlines the step-by-step process for importing backups using the Percona Everest UI.
-
Log in to the Percona Everest UI.
-
From the Percona Everest homepage, click Import. Select the database type as MongoDB. The Basic Information page will be displayed.
-
Fill in the details on the Basic information page and click Continue. This will take you to the Import info page.
-
Select the data importer from the dropdown on the Import information page.
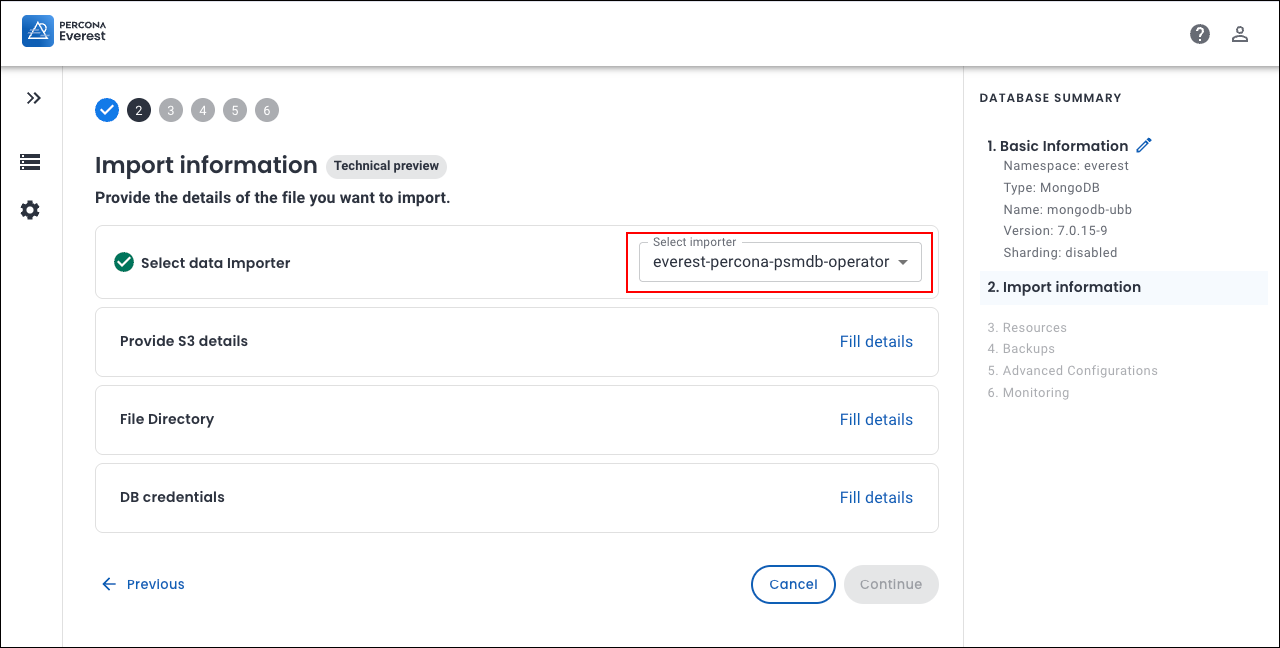
-
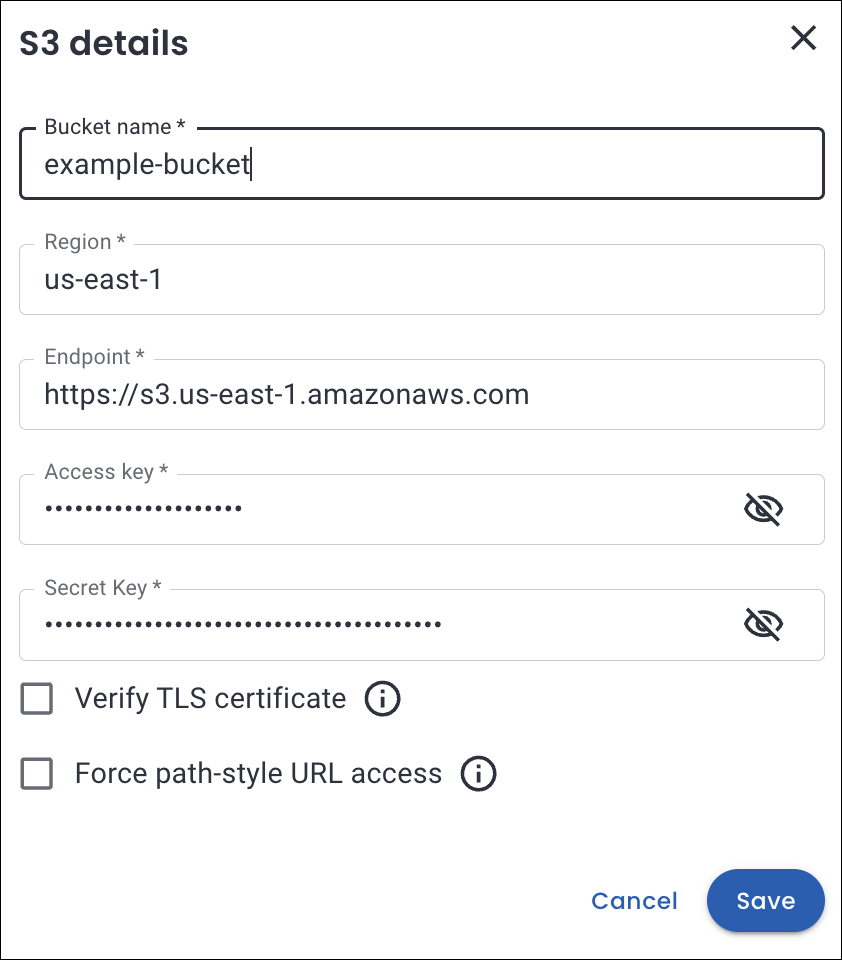
Click Fill details to provide your S3 storage details. The S3 details page will open. Enter the following:
- Bucket name: Enter the unique name identifying your S3 storage bucket.
- Region: Select the geographical AWS region where your bucket is hosted (e.g., us-east-1, eu-west-1)
- Access key: Enter your AWS Access Key ID (like a username for API access).
- Secret key: Enter your AWS Secret Access Key (like a password for secure API access).
Click Save.
-
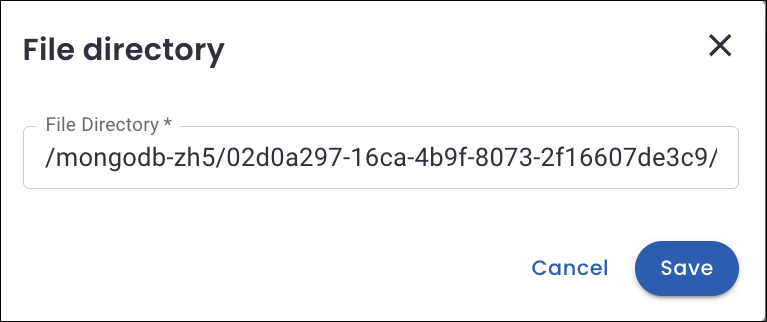
In the File directory section, specify the path within your S3 bucket where the backup files are stored. Click Save.
Important
Percona Everest does not validate file paths or verify the existence of files in the specified storage buckets. Make sure that the backup directory path is correct and accessible.
To verify that the specified path exists, you can use the AWS CLI:
aws s3 ls s3://<bucket-name>/<path-to-backup> --region <region>Find the file path using AWS CLI
Prerequisites:
Ensure AWS CLI is installed and configured on your system. To install AWS CLI, refer to the AWS CLI installation guide.
-
Run the following command:
cat > ~/.aws/credentials [default] aws_access_key_id = SECRET aws_secret_access_key = SECRET -
Navigate your S3 bucket structure:
# List the folders in the bucket
aws s3 ls <S3 bucket-name>

# Output
PRE mongodb-zh5/
PRE postgresql-6az/

# List the subfolders
aws s3 ls <S3 bucket-name>/mongodb-zh5/

# Output
PRE 02d0a297-16ca-4b9f-8073-2f16607de3c9/

# Drill down further
aws s3 ls <S3 bucket-name>/mongodb-zh5/02d0a297-16ca-4b9f-8073-2f16607de3c9/

# Output
PRE 2025-07-01T07:13:32Z/

# Dig deeper
aws s3 ls <S3 bucket-name>/mongodb-zh5/02d0a297-16ca-4b9f-8073-2f16607de3c9/2025-07-01T07:13:32Z/

# Output
PRE rs0/

The file path for MongoDB will be:
/mongodb-zh5/02d0a297-16ca-4b9f-8073-2f16607de3c9/2025-07-01T07:13:32Z/
-
-
In the DB Credentials section, enter the key-value pairs of the user secrets.
Retrieve the credentials from the Kubernetes secret
Run the following command to decode the credentials stored in the Kubernetes secret:
kubectl get secret everest-secrets-mongodb-zh5 -n everest -o jsonpath="{.data}" | jq 'map_values(@base64d)'

Replace `everest-secrets-mongodb-zh5` with your secret name.

Output

{
    "MONGODB_BACKUP_PASSWORD": "3mBRT5XuJSrMzwhB",
    "MONGODB_BACKUP_USER": "backup",
    "MONGODB_CLUSTER_ADMIN_PASSWORD": "hE1M5Eaut93uWJGCykd",
    "MONGODB_CLUSTER_ADMIN_USER": "clusterAdmin",
    "MONGODB_CLUSTER_MONITOR_PASSWORD": "4ICXY35dqCfjZYR2p7",
    "MONGODB_CLUSTER_MONITOR_USER": "clusterMonitor",
    "MONGODB_DATABASE_ADMIN_PASSWORD": "5aQbEZEDjhoAWoSbc03",
    "MONGODB_DATABASE_ADMIN_USER": "databaseAdmin",
    "MONGODB_USER_ADMIN_PASSWORD": "a9pb12A09pSNchldzq",
    "MONGODB_USER_ADMIN_USER": "userAdmin"
    }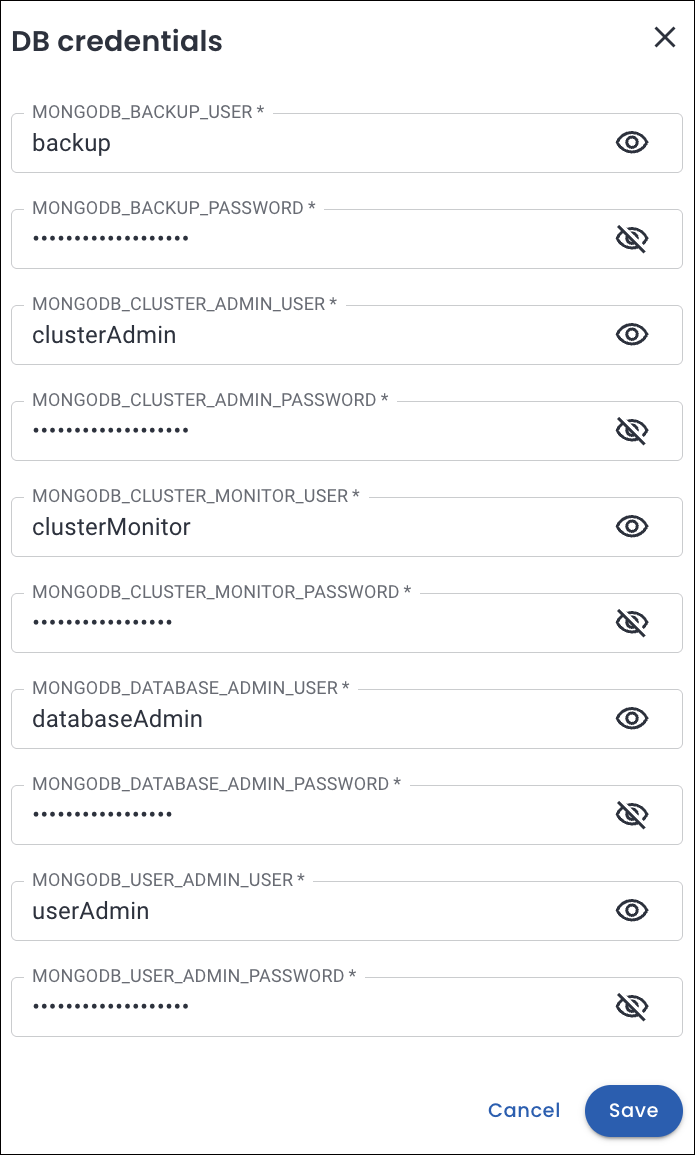
-
-
Click Continue to proceed. You will see the basic information page for your target database.
-
Enter the information and click Continue until you reach the end of the wizard.
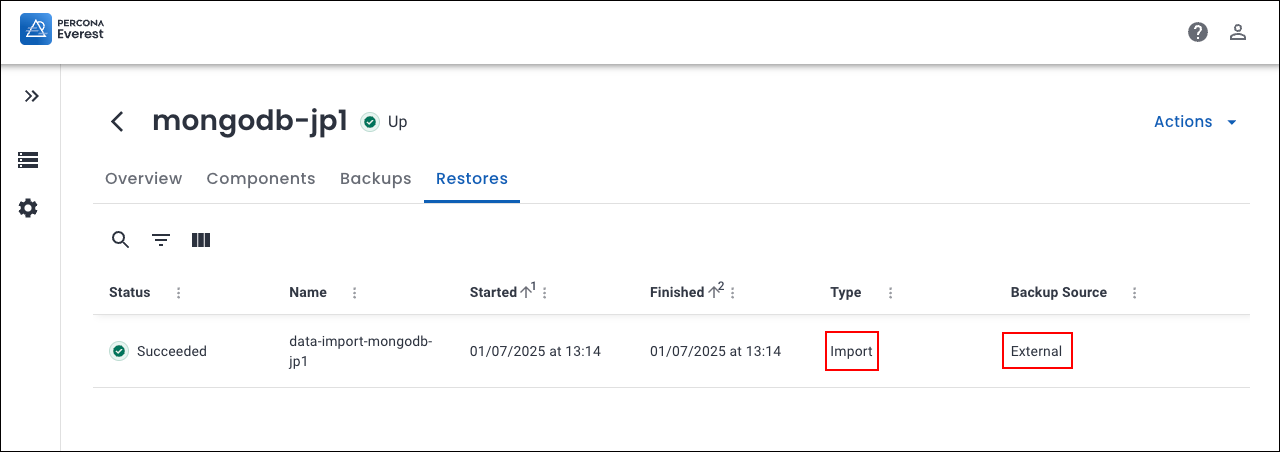
Your backup import process will now start. Once the import is successful, the database status will change to Up.