Custom Pod scheduling policies
Percona Everest allows you to define custom Pod scheduling policies to control how database pods are placed on Kubernetes nodes.
Manage Pod scheduling policies in Percona Everest
A Percona Everest administrator or anyone with the necessary RBAC permissions can create, edit, or delete the Pod scheduling policies. Over time, these policies may need to be updated to add new affinity rules, modify existing ones, or remove outdated configurations.
Create Pod scheduling policy for your DB cluster
Here are the steps to configure pod scheduling rules for the policies for your database clusters:
-
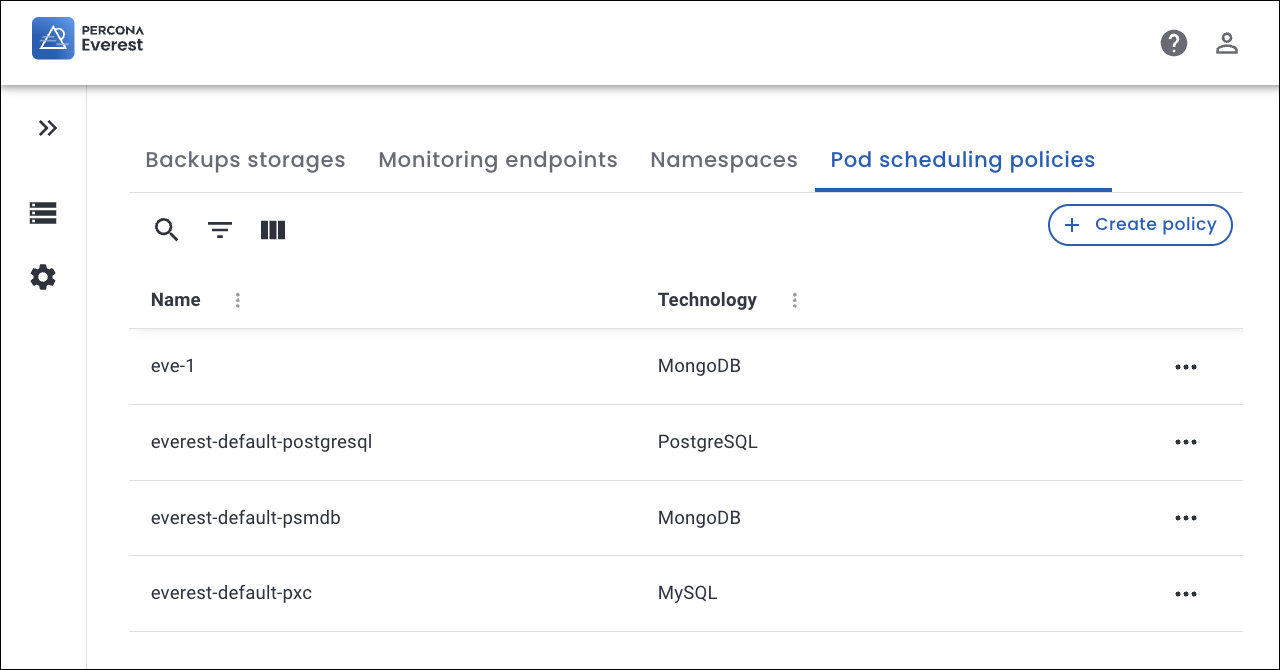
From the Percona Everest home page, navigate to the Settings > Pod scheduling policies page. Here, you can view both default and custom policies.
-
Click Create policy.
-
In the pop-up that appears, enter a Policy name and select the database technology from the dropdown. Click Create.
-
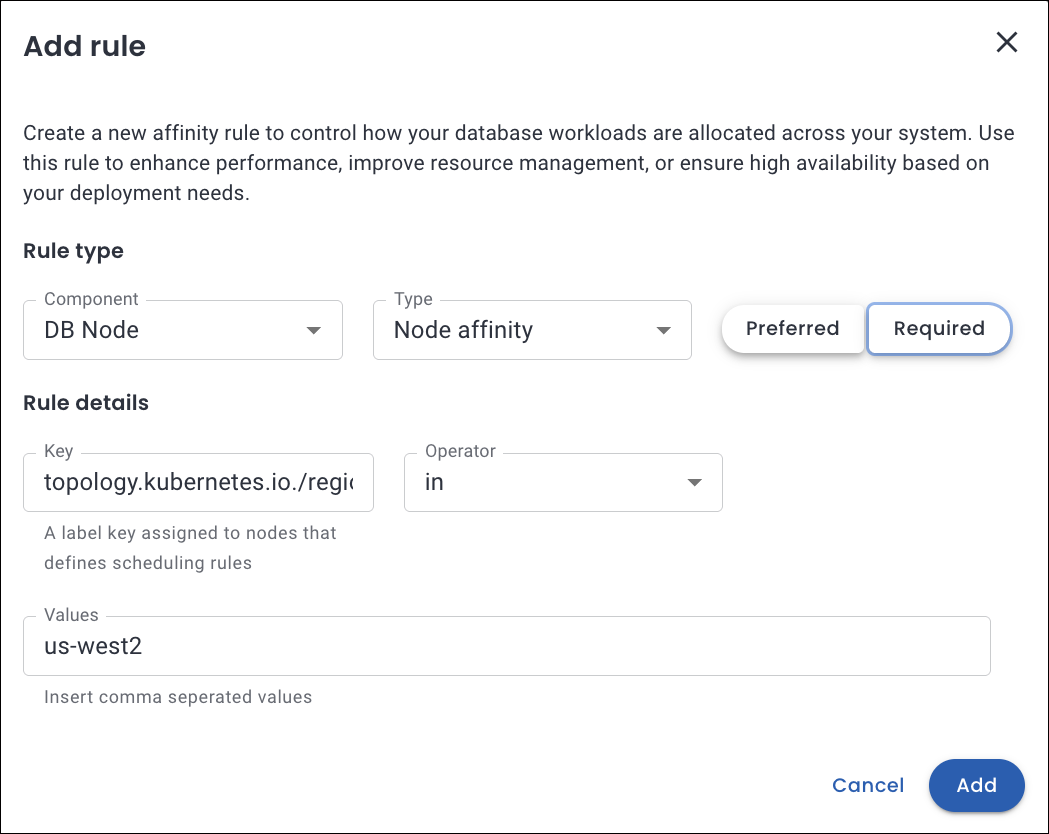
Click Add rule.
-
A pop-up will appear where you need to enter the following details for the Rule type and Rule details section:
Refer to the following table for the detailed attribute descriptions.
📋 Custom Pod scheduling rule attributes
The table below describes the key attributes used to define pod scheduling rules in Percona Everest:
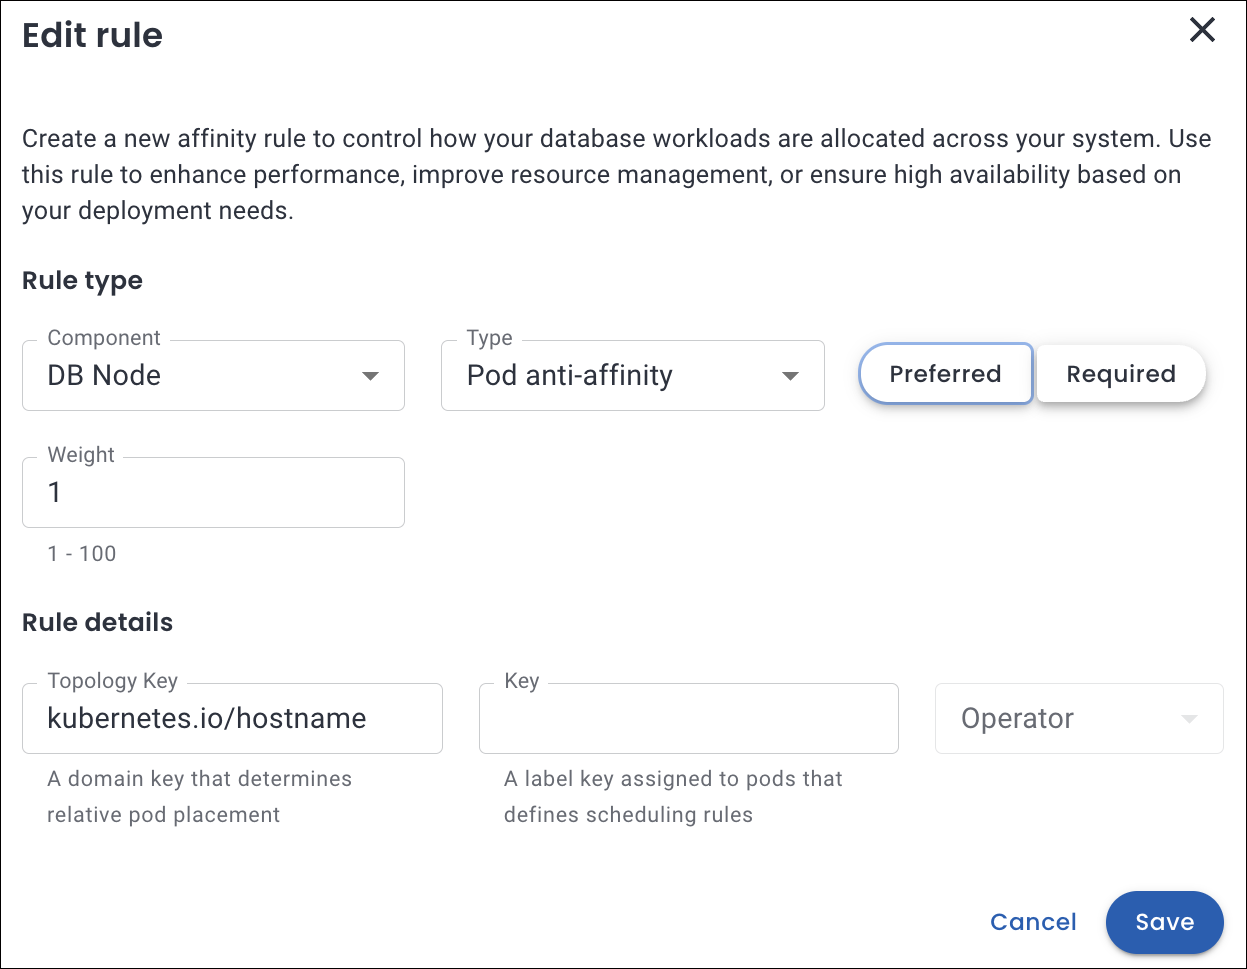
Attribute Description Comments Components The database cluster components the rule applies to:
- DB Node
- Proxy / Router / PgBouncer
- Config Server- DB Nodes and Proxies are applicable for MySQL and PostgreSQL.
- Config Servers apply to MongoDB sharded clusters.Priority Defines the distinct level of rule enforcement:
- Preferred: Kubernetes will try to honor the rule but will schedule the pod even if it’s not met.
- Required: The rule must be satisfied for the pod to be scheduled.Use Preferred for flexible placement and Required for hard constraints. Weight (1–100) Determines the priority of a Preferred rule. Higher values indicate stronger preference. Only applicable to Preferred rules. Topology Key Specifies the domain used to group nodes or pods for affinity. Determines the scope (e.g., zone, hostname) for applying scheduling rules. Examples:
kubernetes.io/hostnametopology.kubernetes.io/zone
topology.kubernetes.io/region
Custom:rackKey The pod label key used in Pod Affinity or Anti-Affinity rules. Helps target specific pods to influence scheduling decisions. Should match a label present on existing pods in the cluster.
Examples:
-app
-security
-environment
- Custom:web-storeOperator Logical condition used to evaluate the Key and Values. Determines how Kubernetes interprets the label match. Supported Operators:
-In: Matches if the label value is in a specified list
-NotIn: Matches if not in the list
-Exists: Matches if the label key exists (regardless of value)
-DoesNotExist: Matches if the label key does not existValues Specific label values that must match for the rule to apply. Required when using InorNotInoperators.Examples:
-s2
-database
-production
- Custom:finance,cache-tier -
Click Add to save the rule. The new pod scheduling policy is now available and can be applied to relevant components.
Update Pod scheduling rule for a policy
Warning
If a user modifies a policy that is already in use by any DB cluster, the rule changes are propagated immediately to all DB clusters using this policy, which may result in restarts of DB pods.
Here are the steps to update a Pod scheduling policy rule:
-
From the Percona Everest home page, navigate to the Settings > Pod scheduling policies page.
-
Select the policy that you want to update.
-
Click on the Edit icon. The Edit rule pop-up opens.
-
Make the required changes and click Save.
The updated policy will be applied to all the affected database clusters.
Delete pod scheduling policy
If a specific Pod scheduling policy is no longer needed, the Percona Everest Administrator or anyone with the proper permissions can delete it.
Here are the steps to delete a Pod scheduling policy:
-
From the Percona Everest home page, navigate to the Settings > Pod scheduling policies page.
-
Click the ellipsis (three dots) next to the policy you want to delete.
-
Click on the Delete icon. The Delete Rule confirmation pop-up opens.
-
Click Delete.
Note
Before deleting a policy, ensure it is first removed from any cluster where it has been applied.