Provision a database
Provisioning a database instance involves setting up and configuring a database instance on the Percona Everest platform.
Warning
Refrain from changing the password of administrative users (e.g., root, monitor, or operator) manually in the database. This action may cause inconsistencies with the secrets stored in Kubernetes, which are crucial for the proper functioning of the cluster. Such modifications have the potential to disrupt your cluster.
We are developing a new feature that will allow you to modify these settings directly from the user interface (UI).
Procedure
To provision a new database:
-
Log into the Percona Everest UI.
-
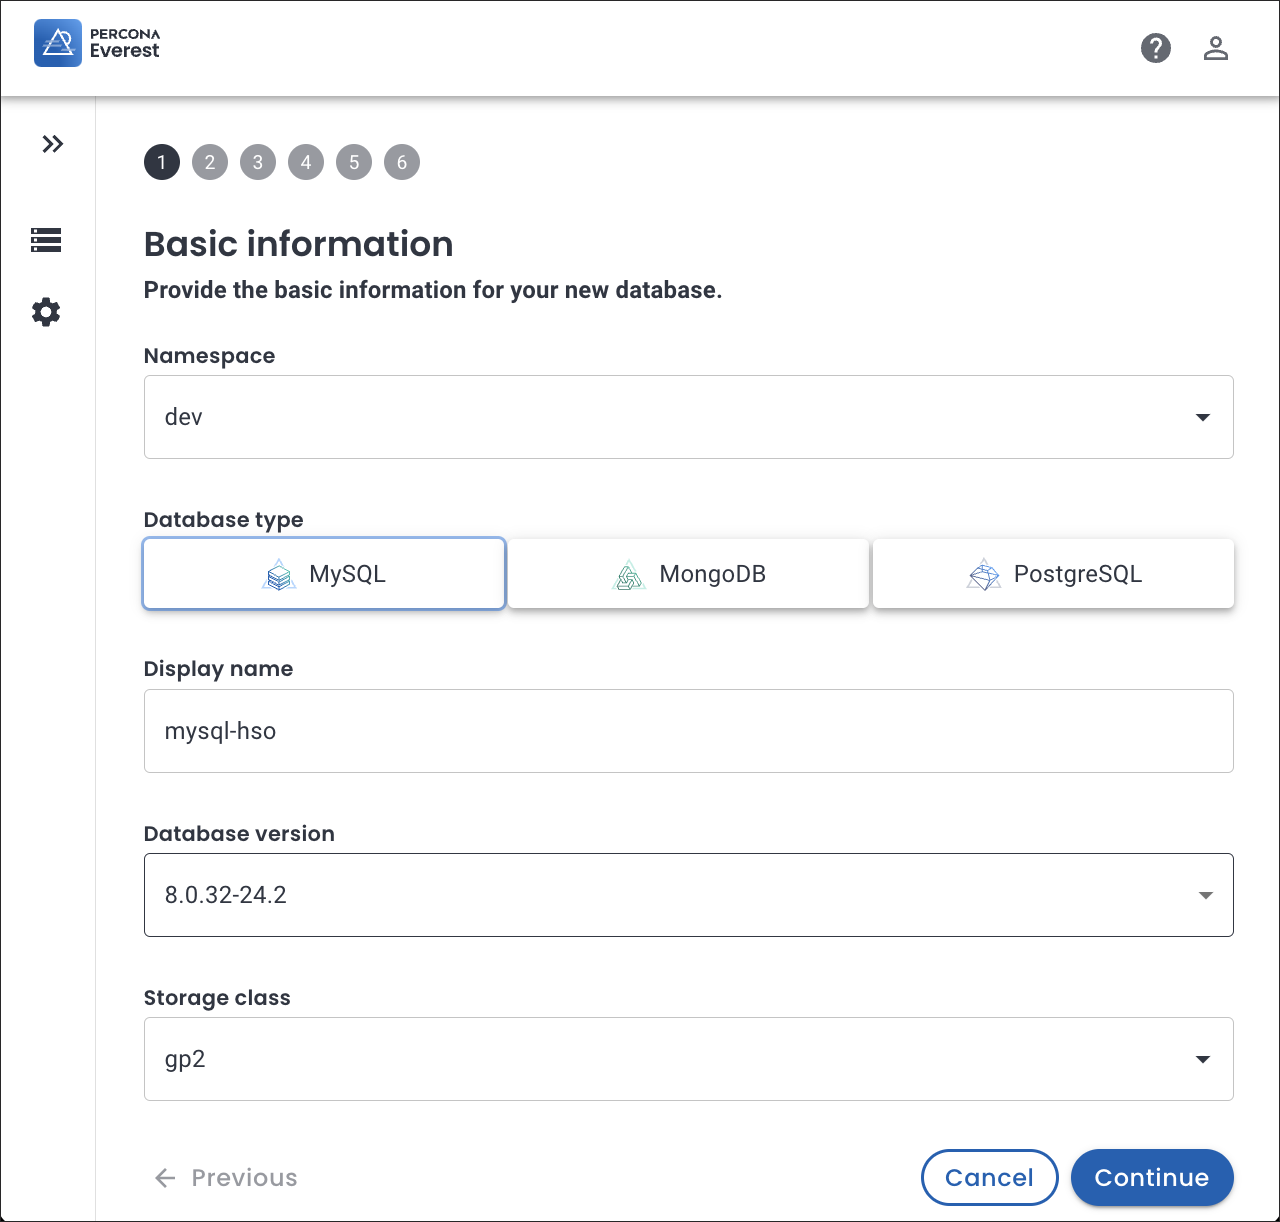
On the Percona Everest homepage, click Create Database. The menu for the different database types will open. Select the database that you wish to provision. The Basic Information page will then be displayed.
-
On the Basic information page, provide the following details:
-
Select the Namespace where you want to create your database.
-
Choose a name for your database. The name is auto-populated, but you can modify it according to your needs.
-
Select the Database version from the dropdown.
-
In the Storage class field, select one of the classes created by your Kubernetes administrator.
Storage classes define what storage configuration and features will be used for storing your database data. Different classes map to different quality-of-service levels, backup policies, persistent volumes, or to arbitrary policies determined by your cluster administrator. For more information, see Storage Classes in the Kubernetes documentation.
-
-
Click Continue. The Resources page will be displayed.
-
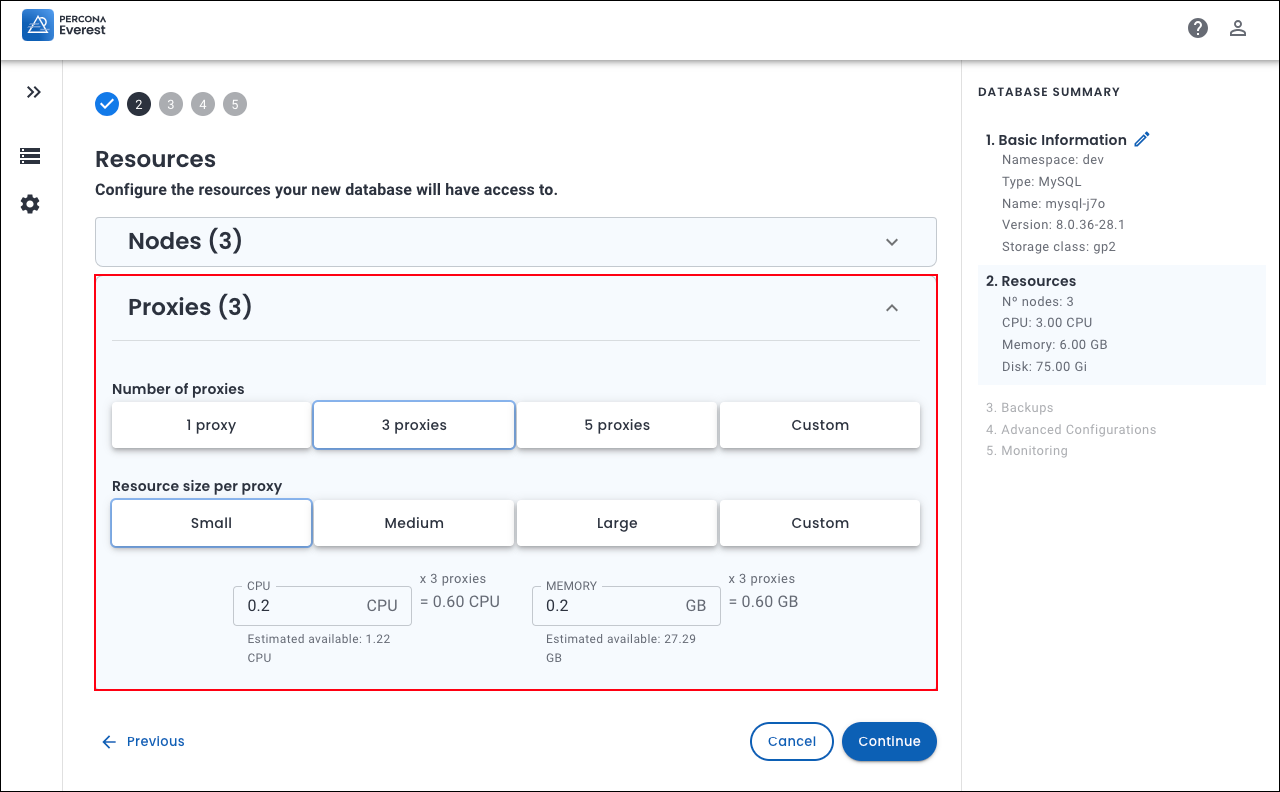
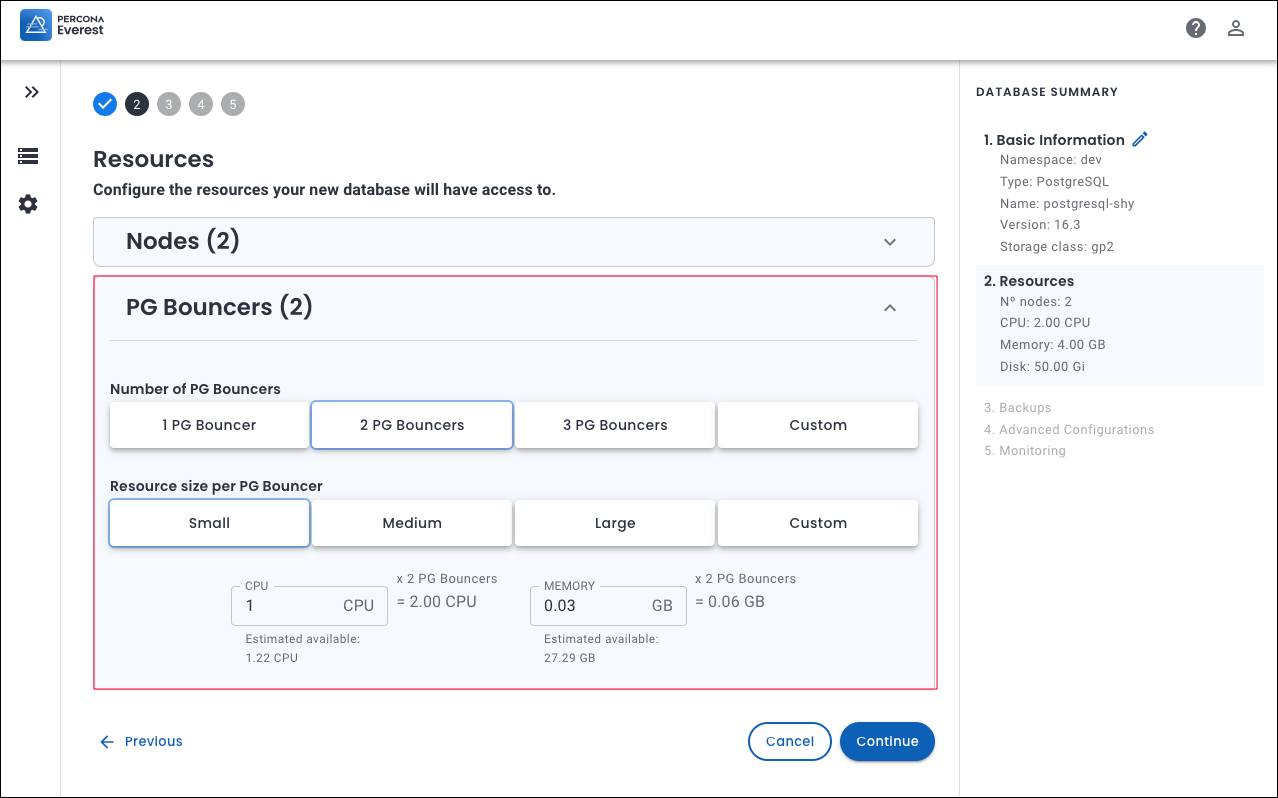
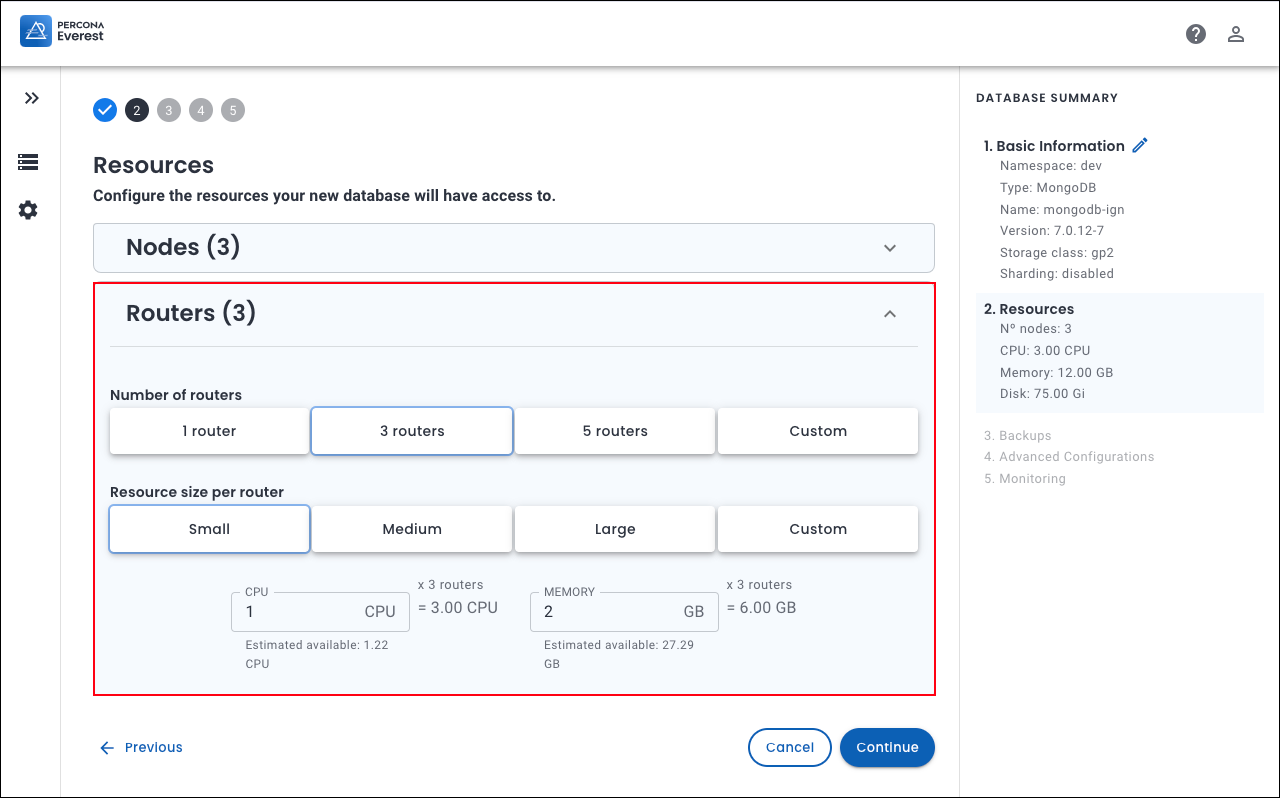
On the Resources page, select the Number of nodes. Also, set Resources size per node by selecting one of the predefined presets or by specifying the CPU, Memory, and Disk. For more information on resources, see the Scale database deployment section.
Additionally, based on the database technology you’re working with, select the following:
-
MySQL: On the Proxies panel, select the Number of proxies and Resource size per proxy.
Info
Proxies are used primarily to ensure high availability, load balancing, and database failover management. They act as intermediaries, ensuring client requests are directed to the appropriate database instances.
-
PostgreSQL: On the PG Bouncers panel, select the Number of PG Bouncers and Resource size per PG Bouncer.
Info
PgBouncer manages PostgreSQL connections, particularly in high traffic environments.
-
MongoDB: If you enable sharding, you can see the Routers panel on the Resources page. Select the Number of routers and the Resource size per router.
-
-
Click Continue. The Scheduled Backups page will be displayed.
-
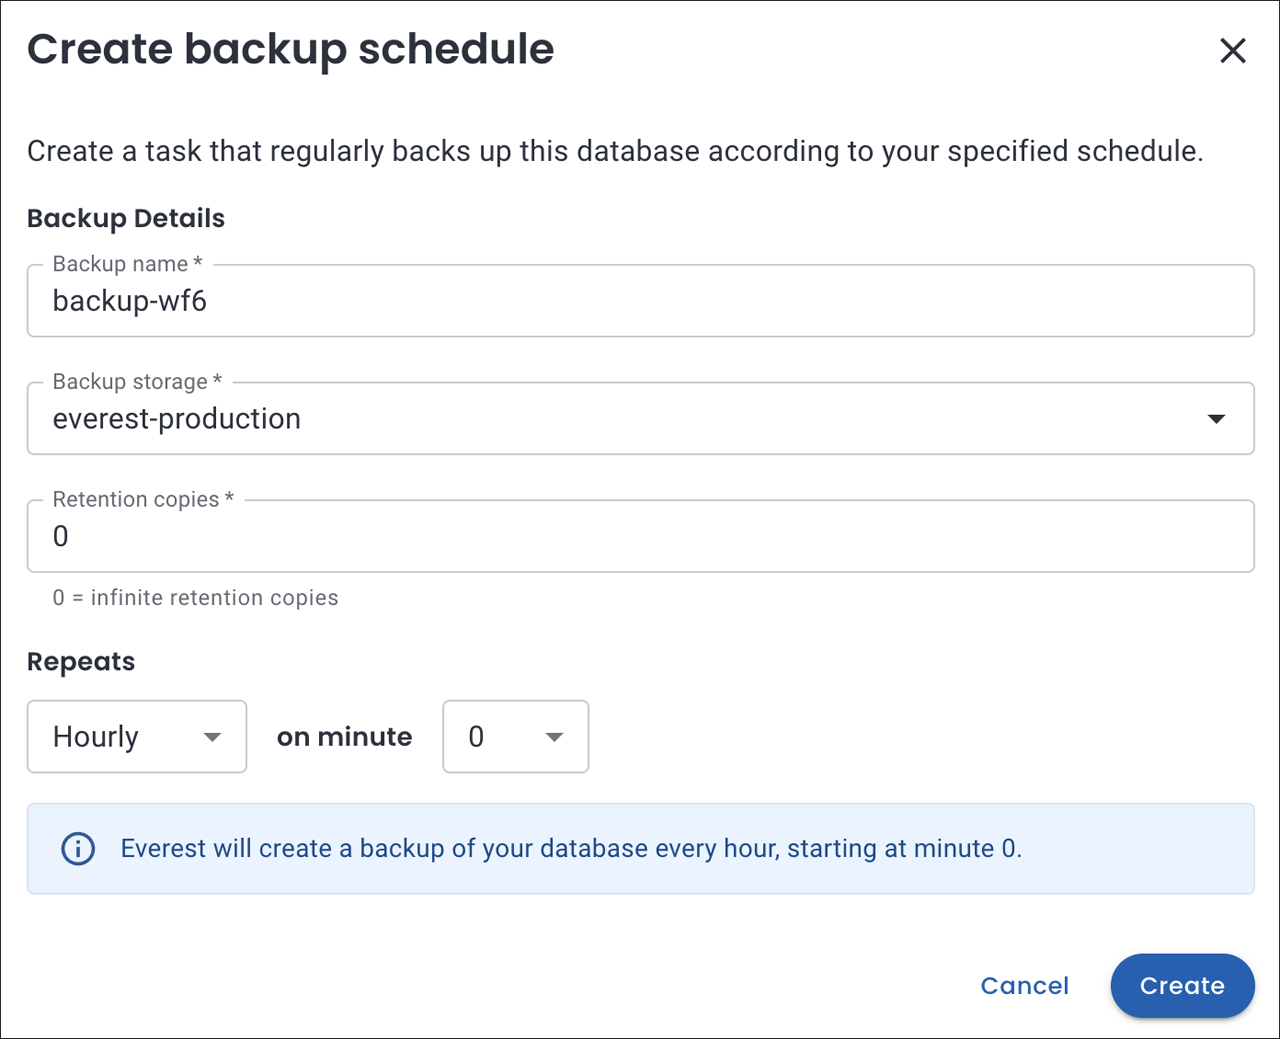
On the Scheduled Backups page, set up a schedule to run backup jobs for your new database.
Click Create backup schedule. The backup schedule pop-up is displayed.
Provide the following details on this page:
-
Choose a name for your backup schedule. The name is auto-populated, but you can modify it according to your needs.
-
Select the Backup storage from the dropdown.
-
Enter the number of Retention copies for the backups.
Note
Currently, Retention copies are not supported for PostgreSQL databases.
Retention copies refer to the number of backup instances that should be kept.
Example: When you set retention copies to 3, it means that you want to keep a maximum of 3 backup copies at any given time. So, if you have 3 backups already and then run a 4th backup, the oldest backup will get deleted automatically.
-
-
On the Scheduled Backups page, you can also enable Point-in-time Recovery (PITR) by turning the toggle on.
-
Click Continue. The Advanced Configurations page will be displayed.
-
On the Advanced Configurations page, you can fine-tune the following settings:
-
Storage: Select the storage class for your database.
-
Pod scheduling policy: Enable and configure rules that define how pods are distributed across nodes.
-
Exposure method: Choose how the database is exposed:
-
Cluster IP for internal access within the Kubernetes cluster
-
Load Balancer for external access outside the Kubernetes cluster
-
-
Split-Horizon DNS: Enable it by turning the toggle ON. Select the desired Split-Horizon DNS policy from the dropdown.

For in-depth information, see the configure Split-Horizon DNS policy section.
-
Database engine parameters: Enable and customize advanced engine parameters for fine-tuned control.
For in-depth information, see the configure database engine section.
-
-
Click Continue. The Monitoring page will be displayed.
-
On the Monitoring page, you can enable monitoring by turning the toggle on and selecting the Monitoring endpoint from the drop down.
If you have not added any monitoring endpoint, click Add monitoring endpoint. For information on adding monitoring endpoints, see the monitoring endpoints section.
-
Click Create Database.
-
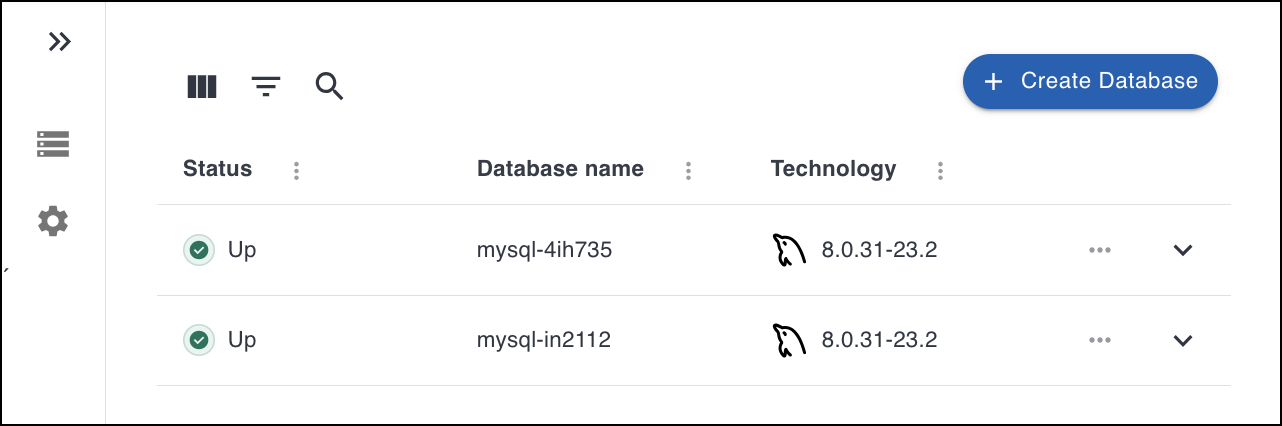
Click Go to list of my databases to see the database that you provisioned.
Video tutorial
You can also learn about creating databases by checking the video tutorial below: