Connect PostgreSQL databases to PMM
Connect your PostgreSQL databases—whether self-hosted or running in the cloud—to Percona Monitoring and Management (PMM) for comprehensive performance monitoring and analysis.
PMM Client supports collecting metrics from PostgreSQL-based database systems:
For monitoring Amazon RDS PostgreSQL instances, see Connect Amazon RDS instance.
Setup process at a glance
These are the high-level steps for configuring PostgreSQL monitoring in PMM:
- Prerequisites: Ensure PMM Server is running and PMM Client is installed
- Create PMM user:
CREATE USER pmm WITH SUPERUSER ENCRYPTED PASSWORD 'StrongPassword' - Configure extension: Set up
pg_stat_statementsorpg_stat_monitor - Add service: Use PMM UI or command line to add the PostgreSQL instance
- Verify connection: Check PMM Inventory and dashboards for data.
Before you start
Check that:
- PMM Server is installed and running with a known IP address accessible from the client node.
- PMM Client is installed and the nodes are registered with PMM Server.
- You have superuser (root) access on the client host.
- You have superuser access to any database servers that you want to monitor.
PMM follows PostgreSQL’s end-of-life policy. For specific details on supported platforms and versions, see Percona’s Software Platform Lifecycle page.
Create a database account for PMM
PMM requires a dedicated database account with appropriate permissions to collect metrics effectively. We recommend creating a PMM database account that can connect to the postgres database with the SUPERUSER role.
To create a user with the SUPERUSER role:
-
Create a user with SUPERUSER role:
CREATE USER pmm WITH SUPERUSER ENCRYPTED PASSWORD 'strong_password'; -
Edit the
pg_hba.conffile to enable local login:local all pmm md5 # TYPE DATABASE USER ADDRESS METHOD
For RDS instances where SUPERUSER cannot be assigned directly:
-
Create the user:
CREATE USER pmm WITH ENCRYPTED PASSWORD 'strong_password'; -
Grant the
rds_superuserrole:GRANT rds_superuser TO pmm; -
Optionally, set a connection limit (only if the user is not a SUPERUSER):
ALTER USER pmm CONNECTION LIMIT 10;
Configure authentication
After creating the database user, complete the configuration:
-
Reload the PostgreSQL configuration:
su - postgres psql -c "select pg_reload_conf()" -
Verify the PMM user can connect locally:
psql postgres pmm -c "\conninfo" -
Enter the password for the pmm user when prompted:
Choose a monitoring extension
Decide which PostgreSQL monitoring extensions to use, and configure your database server for it.
Choose:
pg_stat_monitorwhen you need comprehensive monitoring capabilities with more detailed insights into query performance:pg_stat_statementswhen you need a lightweight, built-in solution with minimal overhead
| Aspect | pg_stat_statements | pg_stat_monitor |
|---|---|---|
| Origin & packaging | • Official PostgreSQL extension • Part of postgresql-contrib package on Linux |
• Developed by Percona • Requires separate installation |
| Key features | ✔ Basic query statistics ✔ Simple aggregation ✔ Minimal overhead ✔ Query timing and execution counts |
✔ Enhanced metrics collection ✔ Bucket-based aggregation ✔ Query examples ✔ Histogram data ✔ Includes all pg_stat_statements features |
| Best for | ✔ Development environments ✔ Simple monitoring needs ✔ Resource-constrained servers |
✔ Production environments ✔ Detailed query analysis ✔ Performance tuning |
| Installation complexity | ⚠ Low | ⚠ Medium |
| Benefits | • Part of official PostgreSQL • Minimal overhead • Simple to set up and use |
• Builds on pg_stat_statements features • Bucket-based time-series analysis • Query examples for troubleshooting • More accurate performance data |
| Drawbacks | • No aggregated statistics or histograms • No Query Examples • Limited metrics collection |
• Slightly higher resource overhead • Requires separate installation • More complex configuration |
| Known Issues | None | ⚠️ PMM v2.x/v3.x: Query plan metrics cause incorrect time measurements (off by 1000x+) |
For a more detailed comparison of extensions, see the pg_stat_monitor documentation.
Configure monitoring extension
pg_stat_monitor is Percona’s advanced PostgreSQL monitoring extension that enhances observability with detailed query metrics and improved aggregation. It is compatible with PostgreSQL (Community Edition) versions 11 through 18 and Percona Distribution for PostgreSQL versions 11 through 17.
Query plan metrics known issue
Before configuring pg_stat_monitor, make sure that pg_stat_monitor.pgsm_enable_query_plan stays disabled. This is because query plans causes pg_stat_monitor to create multiple records for each query, leading to incorrect timing calculations.
To keep query plan disabled during configuration:
ALTER SYSTEM SET pg_stat_monitor.pgsm_enable_query_plan = off;
SELECT pg_reload_conf();
SHOW pg_stat_monitor.pgsm_enable_query_plan;
To configure pg_stat_monitor:
-
Install the extension:
- For Percona Distribution for PostgreSQL: Install via your Linux package manager after setting up the Percona repository, making sure to use the command with your actual PostgreSQL version:
apt install -y pg-stat-monitor-15 - For Standard PostgreSQL: Download and compile from source code.
- For Percona Distribution for PostgreSQL: Install via your Linux package manager after setting up the Percona repository, making sure to use the command with your actual PostgreSQL version:
-
Configure PostgreSQL settings in
postgresql.conf:# Add to shared libraries shared_preload_libraries = 'pg_stat_monitor' # Required for PMM pg_stat_monitor.pgsm_query_max_len = 2048 # Recommended settings pg_stat_monitor.pgsm_normalized_query = 1Using both extensions?
If using with pg_stat_statements, list it first:
shared_preload_libraries = 'pg_stat_statements, pg_stat_monitor' -
Restart your PostgreSQL instance:
systemctl restart postgresql -
Create the extension:
psql -d postgres -c "CREATE EXTENSION pg_stat_monitor;" -
Verify the installation:
SELECT pg_stat_monitor_version();
About bucket-based aggregation
pg_stat_monitor uses buckets to collect and aggregate statistics:
- Each bucket collects data for a configurable time period
- When a bucket expires, data moves to the next bucket in the chain
- When all buckets are full, the oldest bucket is reused
- If a bucket fills before expiring, excess data is discarded
pg_stat_statements is the built-in PostgreSQL extension for tracking query performance, available as part of the postgresql-contrib package.
-
Install the required package:
- Debian/Ubuntu:
apt install -y postgresql-contrib - Red Hat/CentOS:
yum install -y postgresql-contrib
- Debian/Ubuntu:
-
Add these lines to your
postgresql.conffile:shared_preload_libraries = 'pg_stat_statements' track_activity_query_size = 2048 # Increase tracked query string size pg_stat_statements.track = all # Track all statements including nested track_io_timing = on # Capture read/write stats -
Restart the PostgreSQL server:
systemctl restart postgresql -
Create the extension:
psql postgres postgres -c "CREATE EXTENSION pg_stat_statements SCHEMA public"Best practice
Create the extension in the
postgresdatabase to access statistics from all databases without configuring each one individually.
Query examples and data privacy
PostgreSQL query example collection depends on your chosen query source.
Disabling query examples with pgstatmonitor
When using pgstatmonitor, query examples are collected by default but can be disabled for privacy.
For pg_stat_statements, query examples are never collected by design, providing inherent privacy without requiring any configuration.
When adding a PostgreSQL service through the PMM UI, expand Advanced Settings and check Disable query examples. This prevents PMM from storing actual query values while maintaining all other Query Analytics functionality.
Use the --disable-queryexamples flag:
    pmm-admin add postgresql \
    --username=pmm \
    --password=password \
    --query-source=pgstatmonitor \
    --disable-queryexamples \
    PostgreSQL-Private
Add service to PMM
After configuring your database server with the appropriate extension, you need to add it as a service to PMM. You can do this either through the PMM user interface or via the command line.
To add the service from the user interface:
-
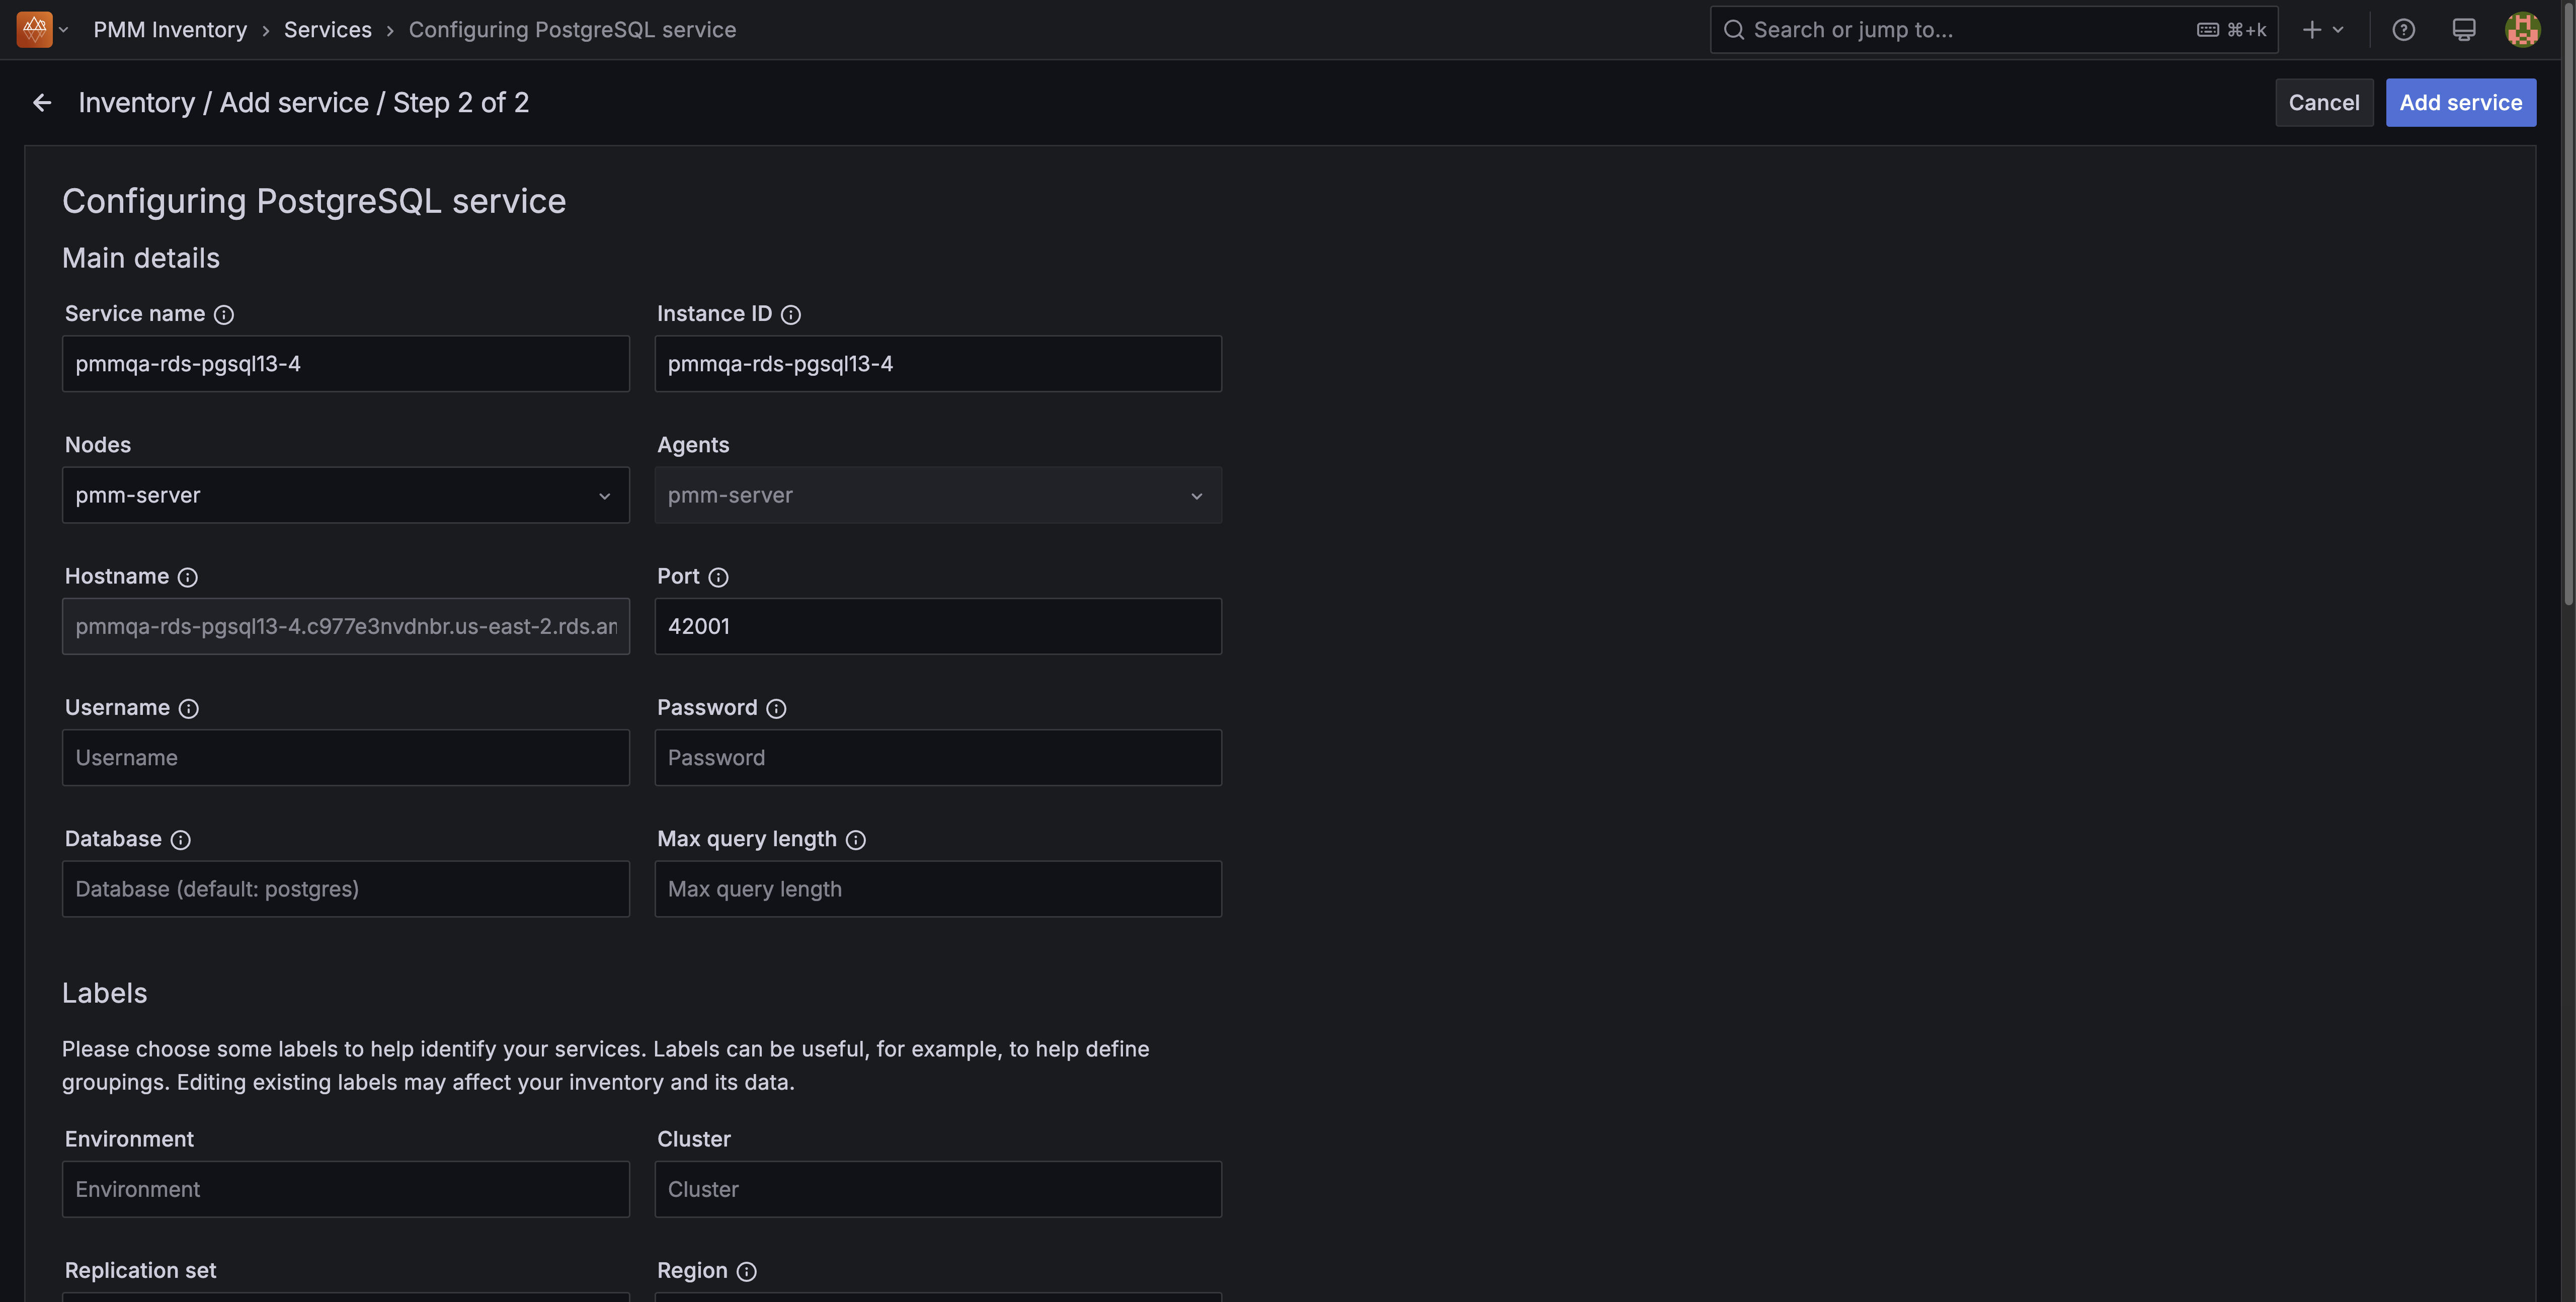
Go to PMM Configuration > Add Service > PostgreSQL.
-
Enter or select values for the fields.
-
(Optional) If using
pgstatmonitor, check Disable query examples under Additional options to prevent collection of actual query values. This protects sensitive data while preserving all query metrics and performance statistics in QAN. -
Click Add service.

-
If using TLS, check Use TLS for database connections and fill in your TLS certificates and key.
For TLS connection, make sure SSL is configured in your PostgreSQL instance.
Make sure SSL is enabled in the server configuration file postgresql.conf, and that hosts are allowed to connect in the client authentication configuration file pg_hba.conf.
See PostgreSQL documentation on Secure TCP/IP Connections with SSL.
Add an instance with default node name:
pmm-admin add postgresql \
--username=pmm \
--password=password \
--server-url=https://admin:[email protected]:443 \
--server-insecure-tls
The service name will be automatically generated based on the node name.
Add an instance with a specified service name:
pmm-admin add postgresql \
--username=pmm \
--password=password \
--server-url=https://admin:[email protected]:443 \
--server-insecure-tls \
--service-name=SERVICE-NAME
Add an instance using a UNIX socket:
pmm-admin add postgresql --socket=/var/run/postgresql
where:
/var/run/postgresql: Directory containing the socket
Add an instance with TLS security:
pmm-admin add postgresql --tls \
--tls-cert-file=PATHTOCERT \
--tls-ca-file=PATHTOCACERT \
--tls-key-file=PATHTOKEY \
--host=HOST \
--port=PORT \
--username=USER \
--service-name=SERVICE-NAME
where:
PATHTOCERT: Path to client certificate filePATHTOCACERT: Path to certificate authority filePATHTOKEY: Path to client key fileHOST: Instance hostname or IPPORT: PostgreSQL service port numberUSER: Database user allowed to connect via TLS (should match the CN in the client certificate)SERVICE-NAME: Name to give to the service within PMM
Configure auto-discovery
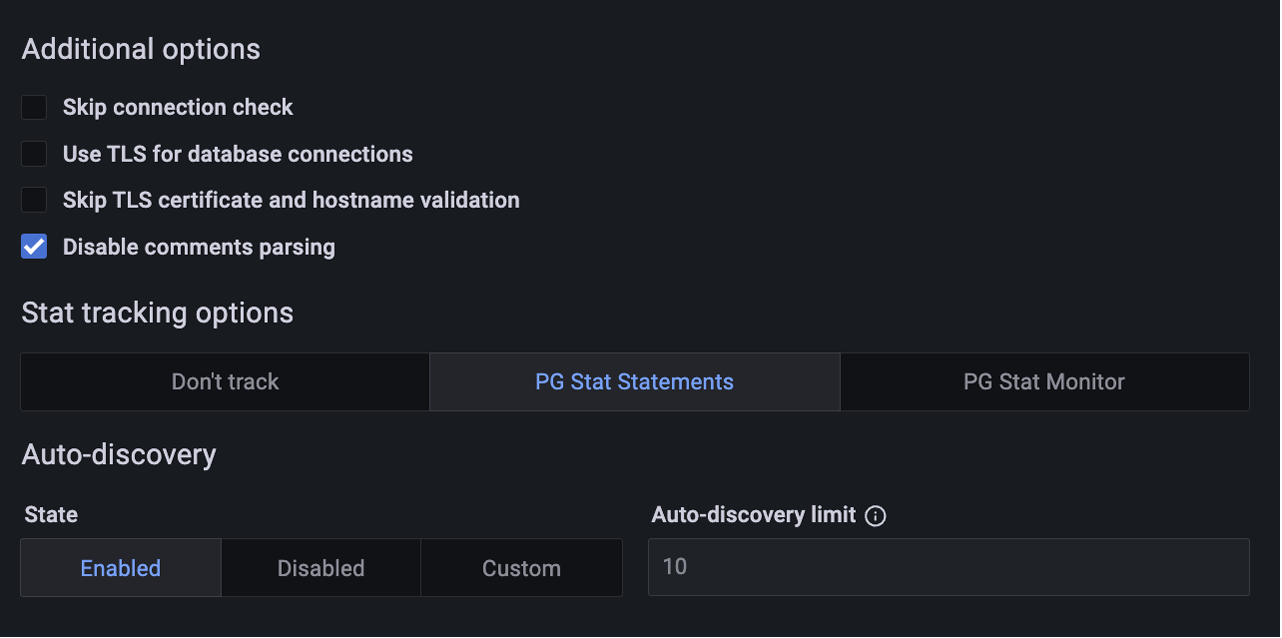
Auto-discovery dynamically identifies all databases in your PostgreSQL instance. This feature helps balance comprehensive monitoring with resource efficiency.
Performance impact
Limiting auto-discovery may result in fewer metrics being captured from the non-primary databases. Ensure that you set the limit appropriately:
- High limits may impact performance by creating too many connections
- Low limits may result in missing metrics from non-primary databases
The pmm-admin flag controls Auto-discovery behavior:
--auto-discovery-limit=XXX
How the limit works:
- if number of databases > Auto-discovery limit: Auto-discovery is OFF
- if number of databases <= Auto-discovery limit: Auto-discovery is ON
- if Auto-discovery limit is not defined: Default value is 0 (server-defined with limit 10)
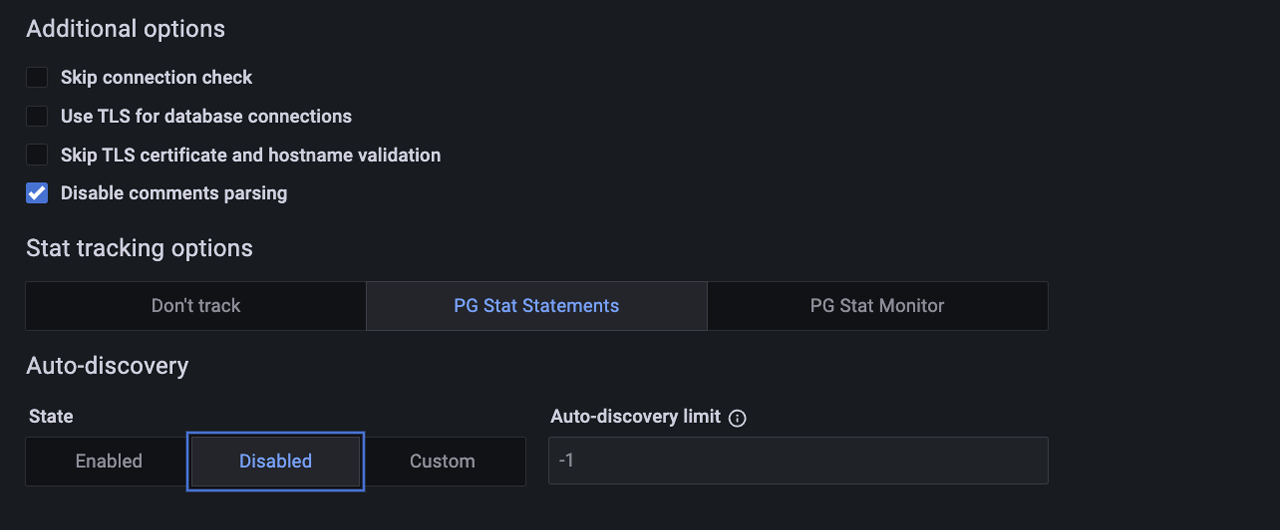
- if Auto-discovery limit < 0: Auto-discovery is OFF
Example:
pmm-admin add postgresql \
--username="pmm" \
--password="password" \
--auto-discovery-limit=10
If your PostgreSQL instance has 11 databases, automatic discovery will be disabled.
By default, Auto-discovery is enabled with a server-defined limit of 10 databases.

When you select Disabled, the Auto-discovery limit will be set to -1.

For a custom value, select Custom and enter your preferred limit.
Check the service
After adding a PostgreSQL service, verify that it’s properly connected and sending data to PMM.
Run this command to view all services:
pmm-admin inventory list services
Docker environments
If using Docker, use:
docker exec pmm-client pmm-admin inventory list services
Look for your PostgreSQL service in the output and verify that its status is “RUNNING”.
Use the UI to confirm that your service was added and is actively monitored:
-
Select Configuration > Inventory.
-
In the Services tab, verify that Service name matches what you configured, Address points to your PostgreSQL instance and Status shows as “Active”.
-
In the Options column, expand the Details section to check that agents are properly registered and that the expected data source is being used.
Ensure PostgreSQL metrics are flowing and visualized correctly:
-
Open the PostgreSQL Instance Summary dashboard.
-
Select your service name from the dropdown.
-
Verify that metrics are being displayed.
-
Check that the graphs are updating with current data.
Running custom queries
The PostgreSQL exporter can execute custom queries to collect additional metrics beyond what PMM provides by default.
Custom queries must be defined in this directory on the host where the exporter is running:
/usr/local/percona/pmm/collectors/custom-queries/postgresql
Three resolution directories are available:
| Directory | Execution Frequency |
|---|---|
high-resolution/ |
Every 5 seconds |
medium-resolution/ |
Every 10 seconds |
low-resolution/ |
Every 60 seconds |
Choose the appropriate directory based on how frequently you need the data.
Create YAML files in the appropriate resolution directory with this structure:
query_name:
  query: "SELECT statement goes here"
  master: true|false  # Whether to run only on the master
  metrics:
    - metric_name:
        usage: "GAUGE|COUNTER|LABEL|MAPPEDMETRIC|DURATION"
        description: "Human-readable description of the metric"
Example:
pg_postmaster_uptime:
  query: "select extract(epoch from current_timestamp - pg_postmaster_start_time()) as seconds"
  master: true
  metrics:
    - seconds:
        usage: "GAUGE"
        description: "PostgreSQL service uptime in seconds"
| Metric Type | Description | Use Case |
|---|---|---|
GAUGE |
A value that can go up or down | Memory usage, connection count |
COUNTER |
A cumulative value that only increases | Total queries, bytes transferred |
LABEL |
A string value used for labeling | Database name, table name |
MAPPEDMETRIC |
Maps a query result to a numeric value | State conversion (e.g., “on”=1, “off”=0) |
DURATION |
A time duration | Query execution time, lock wait time |